Teacher Tech Tools

Being a yoga teacher requires a lot of self promotion and preparation for classes. Whether you get yourself a regular gig at a yoga studio or go completely free lance you’ll have to self promote your classes, style, skills, and experience. And then once you get in the studio, you’ll have to deliver. Here are my top tech teacher tools to help you be the best yoga teacher you can be.

Blue Tooth Speaker

Invest in a good quality blue tooth speaker, one that’s light and transportable and that delivers on sound. These come in handy to bring with you to outdoor, public space classes where other options requiring plugging in may not be available, keep in mind however, that if you host class in a very public space or near to a busy road, then even the best blue tooth speaker won’t be heard over honking horns or screaming kids. If you teach on an early Saturday when the public space isn’t busy yet, then bring your speaker for added energy to the class. Chose your playlists wisely.

Actually, Let Someone Else Chose Your Playlist

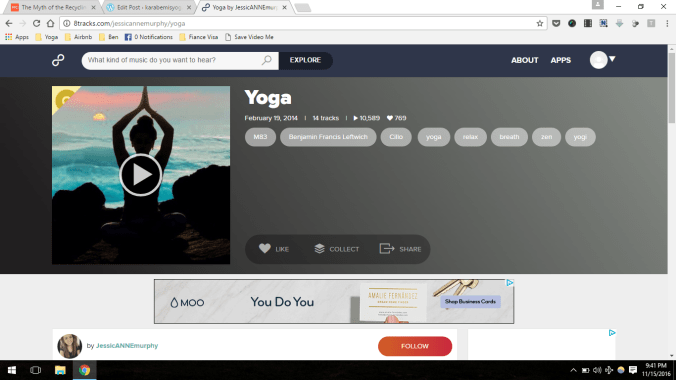
When I first started teaching I used to stress out about making the perfect playlist for each class. Honestly, I would spend more time on the music than on the sequence. I was fixated on having the best tunes for the varying layouts of each class. Thankfully for my schedule and my nerves I’ve loosened up about my music. Now I rely on a sharing service to have strangers in cyber space chose what students vinyasa and hold to. My choice of music site is 8 tracks. I know most people in the U.S. use Pandora, but Pandora wasn’t available abroad in Korea, so a friend introduced me to 8 tracks and I much prefer it. My go to vinyasa flow playlist is simply titled: Yoga.

screenshot-13


Get some Great Graphics12010532_899109916831156_7065303320034350228_o

When creating a social media event page, photos generally star as an eye catcher or are just generic-googled yoga images. But it can be more fun and more professional to create a poster or well designed social media image for your classes and events. For this you can hire out a graphics designer by using 99designs, a website where designers line up to design for you after you’ve set guidelines and price, but this site can be pricey and may not be financially feasible for a free lancin’ yoga teacher (may in fact be a better option for a logo.) Another option is Pic Monkey. This site is easy to use and offers a lot of fun fonts and backgrounds, they have recently started charging for they’re services though, which is a bummer. Above is a simple graphic made in 2015 for a community event I co-hosted with a bunch of great activists in Busan using Pic Monkey.

There you have it, a few simple tips from me to you for using tech to get the job and in class once you have it. Teaching yoga involves a lot more than just shouting out a pose name. As a yoga teacher aim to make your classes and events special and memorable by meticulously planning from the get go all the way through to the song that plays in Savasana. Utilizing tech tools can aid you in achieving that goal which in the long run will aid you in retaining students.


Grace Studios, Free Outdoor Yoga Class, Silver Spring MD

I recently visited my lovely twin sister in Washington D.C. for a few days to see the monuments and museums, but before any of the tourism we attended a free outdoor yoga class near her work in Silver Spring, MD. The class has been running weekly throughout the summer and into September. Luckily my trip caught the second to last class, but my sister’s been attending regularly.

A Silver Spring studio hosts the classes which are held quite literally downtown. I envisioned doing the class under a tree in a small green space so was a little surprised when we turned the corner of the main pedestrian strip downtown and saw the stage set up to do yoga right in the middle of the street. We laid our yoga mats down right in front of the stage and had a seat to wait for the class to begin. By the time 7 o’clock hit there were around 15 people set up all around us, a pretty good number of students.


The class was taught by a teacher named Susan who guided us first through some breathing exercises to ground us for the changing of seasons and then quickly picked up the pace with core work and flows. Personally for me it was just what I needed. Since returning to North America I haven’t been able to attend a single yoga class, so this was my first in three months – a new record I think (one that I hope stays as it is – I need to get back into my home studio again!)

Back to the outdoor yoga class experience, practicing smackdab in the middle of the main shopping and dining area of Silver Spring was slightly uncomfortable at first, but by focusing on deep breathing and dristi (staring or focus of the eyes,) I was able to keep my mind on my mat, consumed by my practice, able to ignore the passer-by-ers all around.

Doing a yoga class as a student in public was a learning experience, seeing as I’ve taught a lot of beach classes but haven’t been a student at many. I was able to feel the vulnerability and shyness that some might feel at outdoor, public classes, and with that will remember to focus and ground my future students the next time I get the opportunity to teach a public class. All in all it was a really nice yoga class. The flow was challenging, yet fun and most of all I was very happy to be able to attend a class with my sister, something that hasn’t happened since 2014.

Unfortunately this post is being written too late for most Marylanders to get to a free community class in Silver Spring, seeing as the last one is tonight, but if you find yourself in the Silver Spring/Takoma Park area and are looking for a nice flow class I’d recommend visiting Grace Studios. I must be honest though and say that I have never personally been to Grace Studios, but my twin sister has and she has really enjoyed the classes there. In fact, she even rented the studio out for a private group birthday class taught by a teacher that she favors. That alone is enough of a good reference for me to tell you to visit.


Yoga Tips for Swimming

I’m fortunate enough to have a boyfriend who likes to learn and study. When he gets interested in something new he learns as much as he can about it. That is what happened with him and swimming – therefore, in our symbiotic relationship I received his skillful knowledge in the pool. Whether you’re a freestyle swimmer in the lane or just want to increase your swimming technique for the beach, I pass these yoga tips and swimming tips along for you to try out and enjoy.

If you’re not a swimmer already  you may want to consider adding a pool session or two to your weekly schedule. Swimming is great cardio that’s much gentler on major joints suffering from strain or arthritis. At first, like any new hobby or exercise routine, i.e. – yoga; swimming can feel frustrating initially. It may feel more like flailing than swimming, but stick with it and you’ll be gliding down the lane before you know it.


Yoga Tips for Swimming

My pool regime consists of gentle warm ups and then goes straight into a few laps of freestyle. Let’s break down freestyle (you know that style that most everyone uses, arms circling up over head, face in the water, legs kicking behind you) from top to bottom of the body parts utilized in terms of yoga warm ups and swimming techniques.

  • Swim Breath: Typically when swimming freestyle you inhale on the surface of the water by twisting your head to one side, through your mouth. Then you slowly exhale through the nose or mouth (I prefer nose.) While still on land, practice slowing down your breath only through your nose and then workshop the breath specific to Bound angle pose
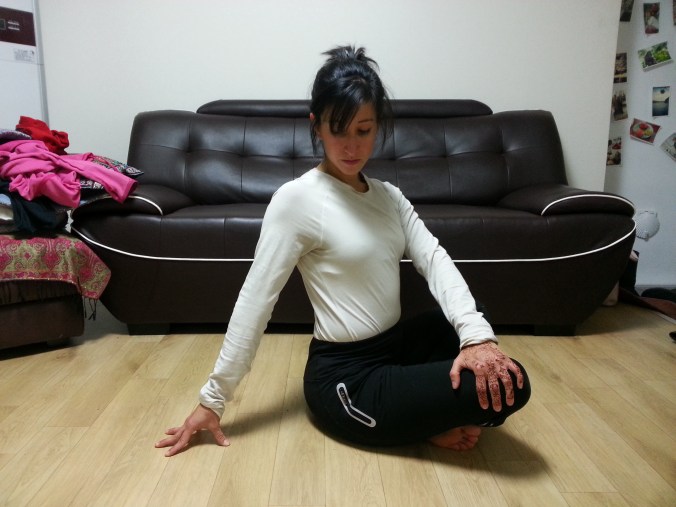
swimming. In a comfortable seated position, turn your head gently to the right and inhale through the mouth, allowing your mouth to open just slightly. Then slowly return the head to center and exhale through the nose or mouth – emphasis on going slowly here – count the exhalations at either a 3 count or 5 count. Turn your head to the left at the end of the empty breath and inhale through the mouth in the same manner as you did the first time. Return the head to center and exhale to your count of 3 or 5. Continue this simple, relaxing breathing technique for a few minutes. Eyes opened or closed.


  • Shoulder Openers: Of course the arms and shoulders are a major component of freestyle swimming, so be sure to safely warm up your shoulders before getting into the pool, especially if you have any shoulder issues. To warm up your shoulders, place your fingers on the tops of your shoulders, elbows pointing out at your side. On an inhalation roll both elbows in towards each other aiming to almost touch them together in front of your face, continue the roll to point the elbows up towards the ceiling keeping your fingers on your shoulders. On the exhalation, roll the elbows back behind you lifting your chest up. Continue to move with the breath and after 10 sets as described switch the direction of the elbows this time inhaling the elbows behind and exhaling them down in front of you for 10 more rounds, adding to 20 total.


  • Twist it Out: After you get in the pool and start your freestyle swim allow yourself to get used to the stroke and breath work attempting to take your inhalations from right and left, which is why counting the breath to a count of 3 or 5 is key. By counting your exhalations to an odd number your inhalations will alter which arm is extending and entering the water, alternating right and left and therefore alternating to which side you turn your head for your inhalation. We all have a dominant side and it’s tempting to breathe in from that dominant side only, but practice inhaling from both sides for balance in your swimming. As your body moves through the swim it will automatically twist to the side that you inhale from, or the side of the back arm that’s exiting the water, elbow up as the other arm is reaching forward and entering the water in front of you. To better understand this movement try it now, seated or standing, begin “swimming” with the arms only and notice how when you reach your right arm forward and pull your left elbow back your body naturally twists at the trunk/core to the left and vice versa when the arms are switched. To increase awareness of twists in the water, warm up outside of the pool with simple yogic seated twists – parivrtta sukhasana. Sit cross legged, spine erect, inhale center and exhale twist to the right placing the left hand on the right knee and right hand behind you to aid the twist. Hold for a few breaths. Return to center on an inhale and exhale to the left. Hold and continue for 10 sets.

20160121_182009.jpg

  • Front Body: The front of our hips and lower torso are often pretty tight from sitting, driving, cycling, and other such activities where the knees are bent and thighs parallel to the floor. Swimming counteracts the sitting position because the legs are extended back behind you, but due to our tight muscles in the fronts of the legs, finding correct form in a freestyle swim can take some time and patience. When you get in the pool, try not to overly bend your knees in your kick. Before jumping in, open your front body by standing feet hip distance with a little micro-bend in your knees. Place your hands at your low back and on an inhalation start by pushing your thighs and hip bones forward extending the stretch up your front body to your chest. Lastly, on the same inhale breath, gently, gently release your neck, careful not to mindlessly drop your head as far back as it goes, but instead keep some control and if it is painful on the neck then keep the chin tucked in the entire time. Start by holding the back bend for 2-3 breaths and slowly come up on an inhalation. Increase the hold as comfortable.


Have fun reigniting or introducing a new, healthy habit into your week. For better success get yourself a pair of decent goggles and a swim cap to keep pesky hairs out of your eyes, and a sporty one piece as opposed to one with cut outs or a bikini, you don’t want to be adjusting in the water. Save the two piece for sun bathing.


Yoga Teachers, Speak Up

Recently I attended a yoga class. It was a full house with about 20 students all ready to flow it out, energy high, and attention focused on the teacher in an evening vinyasa class. I had gotten there early, but not as early as my friend who got us a spot right up front, however the class was so well attended that our front row spots turned into second row spots as more and more students kept filling in the spaces.

As the teacher began to lead I noticed that she was somewhat difficult to hear, even in only the second row. This isn’t good for a teacher. I know that it can be intimidating to basically public speak in front of peers and older students, or even more advanced students than you, but it’s our job as yoga teachers to get up in front of students and guide. Even better if we get up and teach something, but at the very least we have to lead students through a yoga sequence. When we get up there to lead we must remember to speak loudly and confidently, use our teacher voices.

Confidently, there’s an adjective to remember. During my first training, I learned that leading a class with confidence is key, and I believe it. Now, I’m a shy gal, and I know (from my  boyfriend who tells me) that I sometimes drop my voice while teaching. Luckily I grew up as a cheerleader in my teenage years and then became an ESL teacher, so I definitely have a classroom (or yoga studio) voice, but sometimes it peters out and I have to lift it right back up. Speaking loudly while teaching gives the students a reassurance that the teacher knows what they’re talking about, whether teaching English grammar or sun salutations. And I’d argue that it’s even more important to earn your students’ trust through confidence while teaching yoga because it’s important that your students trust you with the safety of their bodies. Yoga’s not inherently dangerous, but it can be, and it’s definitely far more dangerous than learning past participles.

Boardwalk Yoga

Reasons for raising your voice above your general speaking voice go beyond eluding confidence, it also just makes sense. Imagine a studio full of 20 students or more, all staggered to the back of the room – how will the ones at the back hear you if you don’t speak up? Or if you’re fortunate enough to get a teaching gig outdoors, there’s bound to be some noise during your class. You’ll be able to tell if students are having trouble hearing you if you notice many of them craning their necks in downdog to take a peek at what the heck modification you and other students are in. Pay attention to your students signals that they’re sort of lost and adjust your teaching.

Now the title of this post is Speak Up, not shout, unless your style is to be militant like a Spinning teacher, in which case keep being true to yourself. Be mindful not to yell loudly to your front row students so that your back row students can hear you, find your happy medium. And if you’re defending a whisper of a voice because you want your class to be spiritual and calm, then that’s cool, just be aware if you’re effectively being heard or not.

Sunset Savasana

On the flip side of having a relaxing environment in class, remember that you and your students reflect each other in terms of energy. Keep the energy from tanking way before Savasana by using your teacher’s voice and once you enter your cool down section then you can calm it down. And I’m sure that this goes without saying, but while guiding your students in and out of Savasana it’s a good idea to switch to your flowery yoga teacher’s voice.

It might take time to develop this teaching skill, but once you become aware of the issue you can begin to perfect your voice. Speak up and be heard, teachers.


Yoga at Ohio City Farm, Cleveland, by Vision Yoga – Class Review

This past week, from July 18-21, a handful Americans convened on Cleveland for the Republican National Convention (RNC.) Events of the RNC for me included some great live music, witnessing protests and stepping in to participate here and there, and at the end of the week a much needed outdoors, community yoga class.

There was a lot of stress and disbelief for me as a newly repatriated American. Tossed into the heart of Cleveland for the RNC was a little overwhelming, the most being hatred, homophobia, racism, and guns. It was an atmosphere that required deep exhalations.  Countless cops from all over the U.S. in the middle of tension on all sides. There was also a some good happening – people protesting and opposing the hate.

The whole thing had me shaking my head in confusion and disbelief which is why I was ever so grateful for a community class at Ohio City Farm . The class was the day after the convention ended (thankfully,) on Friday afternoon at lunchtime. At first I wasn’t sure if I’d attend since temperatures and humidity were high, but the class was in a far off corner of the farm, under a large, shady tree, in view of the Cleveland cityscape,  with a gentle breeze made the heat bearable.

The class was taught by a teacher from nearby studio, Vision Yoga, which is just a block away from the farm. Unfortunately I didn’t get the chance to visit the studio, but saw the storefront after grabbing a much appreciated post-class burrito. Based on their website, they have a lot of classes going on and are even offering a great new student and locals deal of 4 weeks at $40.

20160722_135832

Vision Yoga Studio 1861 W. 25th Street Cleveland, Ohio 44113

Getting There

The farm is easy to get to and is located just a short walk away from the historic West Side Market. Both are located just of of West 25th Street. The Ohio City Farm’s address is:

Stone Ct, Cleveland OH 44113

Follow this link for more detailed directions on how to get to the Ohio City area.

The Class

The farm class as mentioned before was taught at the far end of the farm, so be sure to give yourself about 10-15 minutes to find the spot and to fill out a waiver form if you haven’t been to Vision Yoga classes before. The class time is 12:15-1PM, just in time for a lunch break practice for those working nearby. It is a community class, or in other words, a donation class, so pay what you can and pay happily knowing that your money is going to a non-profit doing great things.

Community classes at the farm are every other Friday, so pay attention to Vision Yoga’s schedule to be sure that a class is taking place on the day you wish to attend. An organizer that I spoke to mentioned that she wasn’t sure if the classes would continue beyond August, but she and I hoped that classes would continue through September, as long as the weather cooperates.

The Refugee Response

The class that I attended was sponsored by The Refugee Response, an organization that works to help refugees settle into American life by offering English tutoring sessions; and something else that’s really cool – they employ refugees on the farm to work the land. Refugees from all over the world get to share their skills and gain a sense of purpose in their new community of Cleveland.

This is an awesome organization; if I were in Cleveland I would love to volunteer and get involved with them. If you’re local to the 216, then follow this link to find out how you can volunteer and help out. Maybe you can do your part by attending the next Community Class at Ohio City Farm.


Know Your Audience

This applies to so many things, for example while telling a story it should be altered slightly differently if the listeners are your near and dear friends, or say, your new boyfriend’s parents. That’s obvious, isn’t it?

This little colloquialism is also very applicable to yoga teachers. It’s a good piece of advice for new teachers who just finished their intensive 200hr training and it’s a nice reminder to teachers who have been teaching for years, because it always rings true.

Know Your Students’ Levels

Generally, at least. You can’t walk around before your class starts and ask new students to define their ability level – that’s way too much pressure for a student and will cause ego damage, because nobody wants to say that they’re a beginner in a room full of intermediates or hand-standing-advanced students. Which is silly, because at one point we’re all beginners, but for some reason there’s an embarrassment that comes along with being new to something and therefore not as “good” as others (read more of my thoughts on this here.)

Another way to say it is – don’t teach a dynamic series of non-stop standing balancing to a beginners’ class, unless you’ve prepared them well for it in the first 40 minutes of class. Don’t even teach something like that to a mixed level class in which just one or two of the students are beginners.

Why? Well, my two primary reasons are alignment and ego. Fist, and most importantly – the alignment. It takes time and practice to get alignment of yoga poses well enough that you can  move quickly from one to the other with proper alignment. Even a basic pose like Virabhadrasan II (Warrior II) could take a whole year to learn the full-body techniques of where to align the bones and how to tone the right muscles, what to do with the pelvic floor, ribs, chin, the list goes on. So, if you rush a class with students who are not familiar enough with the alignment to do poses without you meticulously telling them everything, then be careful. Overtime poor alignment can lead to joint damage, or if their joints are already weak then they could possibly even injure themselves during the flow, during your class.

The ego comes into play when you as the teacher, whom has practiced years and years, blows through the sequence with ease and to full capability, and the student in their mind feels down for not being able to look and do the same. Of course not all students will think like that, but some will, and they might not come back to your class if they leave feeling worse than when they arrived. People are sensitive and compare themselves to each other; this happens a lot in yoga classes. It’s good to remember this as a teacher.

Teaching

Get a Feel for Which Level of Spirituality is Appropriate

We all know that yoga is about more than body movement, unlike other “workouts,” yoga involves breath synchronization with each individual movement and usually has some level of body and mind union. This might mean a theme of gratitude in a class, or it could go further to include a lesson from Shiva, Hanuman, or the Buddha.

To some students it may be too much to hear about the destructive, dancing Shiva. Or, say

20160307_213008for example if you line up a class venue at a church, it’s probably best not to teach lessons from Hinduism or Buddhism. For me it’s second nature to teach my classes in English and Sanskrit, saying each pose in Sanskrit so that my students learn the pose names, but I gauge who I’m teaching and sometimes stick to just English. Something to not only keep in mind for students of different belief backgrounds, but also for levels. If I teach a group of beginners I explain why I use Sanskrit and where it comes from, something I will try to do even more after reading this insightful article on cultural appropriation and yoga.


Themes of nature and the environment are other themes that I like to incorporate as it is a strongly felt passion that I have; to take care of the waters and land, and as part of that stewardship, to spread knowledge about how and why with others. Put into a word it can be called activism. I consider myself an environmentalist (which can have negative connotations depending on which political party you’re talking to, so changing the label to say that I’m a nature level is more appropriate depending on who’s reading this.) It’s a good idea to create classes with themes like these that are more appropriate for all. Also, as mentioned before, gratitude, mindfulness, and grounding are other great class themes.


When designing a class, keep in mind who your expected audience will be. Plan appropriate poses, themes, and language and be prepared to have to change it all last minute. Being a yoga teacher requires being flexible in more ways than one; know your audience, as best you can predict.

Yogaspace, Prague, Czechia – Studio Review


Yogaspace is very centrally located in Prague. It is near to the main plaza of New Town Square, and according to their website they offer English yoga classes four times per week. Two classes on Tuesday, one Thursday and one on Friday. Times and specifics can be found on the link above. I attended the Tuesday evening Vinyasa Yoga class with Ivana at 6:45pm.

The class was a good pace for the students who attended, and it was well attended. In fact, I nearly didn’t make it in the room it was so packed; it was only due to a “no-show” that I was able to take the last mat space available. In order to secure your spot in a class, be sure to send a message by email or text. Contact information can be found at the bottom of the schedule page linked above.

Their website makes it clear that reservations for drop ins must be made ahead of time, but I guess I was so focused on directions that I overlooked it. It’s completely my fault that I was so close to not getting it, so I’m really grateful for the guy who didn’t show so I could squeeze in (thanks, guy!)

About Yogaspace

  • The Studio – Is average size and fits around 20 students packed in tightly mat-to-mat. When you first walk in you see the changing rooms which are equipped with large lockers with keys for you to secure your belongings during the class. Connected to the entrance way is the studio. It’s long and narrow with windows making up the entirety of the back wall. There are mats for use and mat spray for after class.

20160510_200639.jpg

  • The Class – The Vinyasa class was great, just as the class description said it was dynamic and sweaty (the description didn’t say it’d be sweaty, I’m adding that in myself.) Since the classes are listed with levels you’ll be able to find a class that’s right for you. Although my class was jam packed the teacher sill managed to get around and adjust most of us, which I was grateful for.


  • The Cost – A drop in class costs 220 CZK (about $9 USD) – again, remember to email or text ahead of time. If you’re in Prague for some time you can purchase an entire course of your choosing. Specific costs of each course is listed on the link and range from 1,680-1,820 CZK ($70.50-$76.50 USD.)


  • The Location/Getting There – As noted above, the studio is very central, great for a weary traveler to pop in and unwind after roaming through the big crowds of tourists and vendors in Old Town on those incredibly uncomfortable cobble stone streets! If you’re taking the metro the stop is Mustek (Museum,) exit out of the most eastern (or furthest to the right) exit that points towards New Town plaza. Then follow these directions:

yogaspacedirections

A Note on Getting There !! This is what the outside of the building that the studio 20160510_201704.jpgresides in looks like (with a lost tourist standing in front.) The main sign is for a salon, but if you enter the hangover of the building there is a large sign on the left that has the names of all of the businesses inside. You’ll see Yogaspace listed there. Enter the building, there’s a security guard, but the door was unlocked when I went. Inside the building is where it became like a maze. I was almost super late to the class because I ran up the wrong staircase (twice) and then took an elevator to the wrong area. Only after walking through a hallway to the left of the main elevator did my boyfriend and I find another tiny, hidden elevator at the back  of the back of the building that took us to the 3rd floor where the studio is. It’s as confusing as I’m making it sound, so make sure you give yourself about 15 extra minutes just to find the studio once inside the building.

The large sign listing all of the businesses of the labyrinth of a building. This door is near the second, far away elevator that will take you to the 3rd floor of the yoga studio.


Yogaspace is a nice studio to relax and stretch out in after walking the streets of Prague all day. It’s not always easy to find English speaking studios, so to have one right in the center of the city is a luxury. Just remember these two key things: Book in advance and give yourself plenty of time to get there. Read my other post on tips on Prague here.

5 Elements, Krakow, Poland – Studio Review

After leaving my course in India my daily self practice sadly dropped significantly, from at least twice a day to only here and there. Backpacking around Europe – getting lost in countries where I can’t even say hello – makes for a chaotic schedule in which my yoga practice has been shuffled around to whenever time can be made. Fortunately, however, while staying at an Airbnb in Krakow, Poland I found an English speaking yoga studio and went for a much needed yin class.

The studio that I found – 5 Elements, is not downtown, but is accessible by public transport (directions linked below) and in my case was a 20 minute walk from my Airbnb.

5 Elements is my kind of yoga studio. Here are the reasons why practicing at 5 Elements was worth the wait.

  • English – When traveling it’s not always easy to find an English speaking studio or class. The finding part is sometimes the most difficult. When I choose a studio in a new, foreign city, I choose it based on it’s website and whether the site is in both the native language and also in English. Obviously I can navigate the site much better if it’s in English as opposed to translating the entire site with google. An English website also implies that the class may be taught in English or some degree of English, a bonus for sure. 5 Elements had both an English website (well designed) and an entirely English taught class.


  • Yogic Philosophy – After a thorough read through of the website which included class descriptions, Ayurveda, and a mentioning of yoga and the ego (my kind of philosophy,) I knew that it was a good fit for me, not simply a “workout” place.


  • Atmospheric-  I like a studio to have soft lighting 20160427_192521.jpg(bonus points for candle lit studios,) Sanskrit and Hindi gods on the wall, pillows on comfy seats, and incense a-burnin’. 5 Elements ticked all of those boxes. There was even an incense burner located outside the main entrance of the studio – literally outside on the doorstep. It was a welcome, homey feel on a cold and rainy Wednesday night.
    • However! – The studio itself was pretty small and had very blue tinged lighting (LED I think) which isn’t great to practice a night time yin class in in my opinion, but it didn’t take away from a good practice, I’m just making note.


  • Props- If you’ve ever taken one of my studio classes at Kaizen, or maybe through reading other posts here, you probably noticed that I am a big supporter of props (pun intended.) During the yin class that I took at 5 Elements we used blocks, straps, and eye pillows – lovely! And necessary to find comfort in those long holds!

IMG_3213

How to Visit 5 Elements

Directions: Like my Airbnb, 5 Elements is not actually in the center of Krakow, but is in a residential suburb. Luckily it was walk-able for me (doubly so since I wasn’t so sure on how to even use public transportation in Krakow) but you can follow this link to get directions.

20160427_183006.jpg

Cost: Drop in classes are 35 Polish zloty, but for your first class there’s a special rate of 20 zloty (about $5.) 5 Elements offers an array of different packages that will suit any schedule. They can be found here, which also has the class schedule.

NOTE, Must Book Ahead: As mentioned, the studio practice space is small, which is great for an intimate class, but for this reason you must call ahead to book a spot. The phone numbers to call, both fore English, are listed in the link found directly above.

Happy-U Namaste, San Diego, CA – Review

IMG_6731Breweries, beaches and those epic West Coast sunsets … Yep, I had some expectations of San Diego when I moved here, but I must say I was surprised by the expansive yoga community. Two days after landing, my boyfriend and I were blown away to find an acro jam literally right under our noses on Ocean Beach as we were job hunting from a second-story restaurant. Perfect. We knew we found our new home.

IMG_6732

weekly acro jam at OB

Upon exploring the Ocean Beach neighborhood a little bit more, I found Happy-U Namaste, a yoga studio just a few blocks from the sand. It sits next to a local craft brewery, Mike Hess Brewing, and across the street from Pirate’s Cove Tiki Port, a drive-thru and walk-up coffee and acai bowl shop.

The classes

IMG_6792
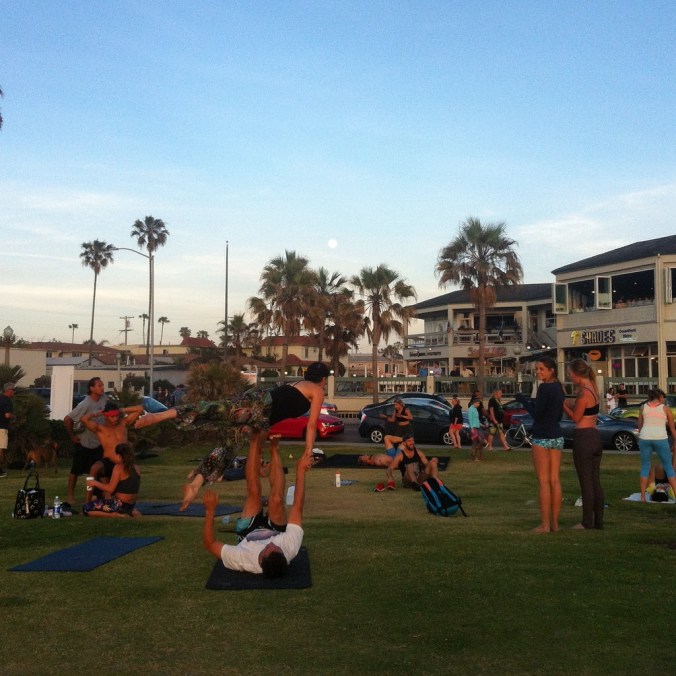
Happy-U is a fairly traditional, single-room yoga studio, advertising “no mirrors” and “no heat” on its flyers. It offers 18 classes a week, from kundalini yoga & meditation to a level 2/3 core vinyasa class. I took three 75-minute classes during my first week of unlimited yoga ($20 for new, local students).

Mellow hatha is an all-levels class. I found it to be restorative and calming, with the sound of crystal bowls and gongs guiding the students through our slow movements. We focused on breath, alignment and relaxing into our poses, followed by a nice, long savasana.

Yoga dance flow was a chance to leave alignment behind and certainly forget about self-consciousness for a while. We began the class with open movement, jogging, skipping, sliding and shuffling around the room, practicing our choice of twists and cat-cow movements intermittently. This yoga dance class was far from the dynamic, choreographed routine I learned in Bali, but it was a beautiful way to flow with a small group and offer various mudras as we moved to soothing music.

For the strong hatha class, students set up in two lines along two of the studio’s walls so we could all face the center of the room. The focus of the class was on lengthening the side body and neutralizing the spine. Throughout the flow, we practiced chaturanga pushups, dancing warrior, bending tree pose, and, towards the end of class, forearm stands and handstands.

Happy-U offers descriptions of all its classes here.

IMG_6793

Facilities

The studio offers water and tea before you head into class. You can grab a mat, blocks, straps, bolsters and blankets at no charge, and there’s mat spray to use post-class.

Pricing

Drop-in classes are $18, but new members can take a week of unlimited classes for $20. Monthly passes are $99, with discounts for Happy-U’s workshops and special events. See more about pricing here.

Special events

In addition to yoga teacher training, Happy-U schedules special events all the time. Upcoming workshops in May include acroyoga, yoga of trust, handstands and advanced adjustments for teachers.

Check out the Happy-U website for current scheduled events.

Location

Happy-U Namaste is in the Ocean Beach neighborhood of San Diego. It’s a quick walk from the beach and Robb Field. For a detailed map and directions, click here.


Kaizen Korea, Busan – Studio Review

There has been plenty of mention in my writings of my good friend and mentor, Mindy Sisco, who has been running the only English language yoga studio in Busan, South Korea since 2012. She works as a team together with co-owner/teacher, Simon Kang. During my two years in Busan I had the good fortune of learning from each of them, practicing an array of classes at Kaizen.

Whether you’ve recently moved to Busan as an English teacher or are visiting a friend for a short time, you should make time in your schedule to get to a yoga class at Kaizen, and here’s why.

NO SMOKE & MIRRORS 

Yoga has a tendency to get frilly-la-la/hippy-tastic, which is nothing bad (I’m sometimes found guilty of drifting into that lotus-flower field,) but don’t expect so at Kaizen. Their yoga classes jump right into the deep end of the physical practice and stay there through the end. There might be some om-ing to end class, but it’s yoga – it’s expected.

THE STUDIO

The same can be said for their studio, which is minimal in nature, but has all the props a prop-aholic like myself could want – blocks, straps, eye pillows, and more blocks. There are cubbies for you to keep your personal items and mats for borrow (ask which are public and which are private first, since some students store their mats there long-term.)

THE TEACHING – They Know Their Stuff!

Mindy & Simon have done their fair shares of trainings and there’s no sign of slowing down. Teaching yoga is what they do, and they are good at it.

12983453_10156683111315567_662446499601727085_o
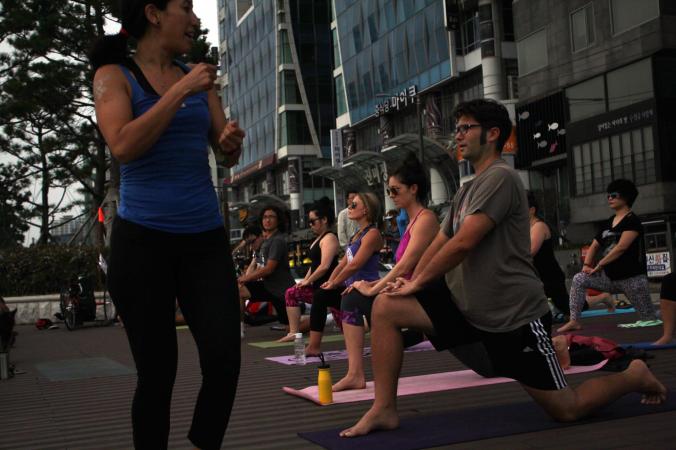
Mindy teaches Ashtanga-Vinyasa classes that bring in elements that feel like physical training. It’s never the same old, same old sun salutation warm ups in her class – she switches it up to work different muscles and prep students for what’s to come. As a fellow teacher, I highly appreciate the design details that each class has and I truly learn from classes, instead of just being guided through poses. The sign of a good yoga teacher.

Her teaching style is creative and unique. Students leave having worked their muscles, often in partner exercises which are an extension of the playful and challenging acro yoga classes that Mindy also teaches. If you thought I couldn’t compliment Mindy’s yoga teachings anymore, then you were wrong because her acro classes are an equally fun way to learn more about yoga, yourself, and yourself through yoga. You can read more about my Kaizen acro experiences here and here, oh, and here (I told you I went to a lot of her classes.)

Simon, the other half of Kaizen, has a background in body weight training which comes through in his classes that push students physically, but most importantly safely. Simon’s other trainings (he also teaches jui-jitsu) aid him as a teacher of yoga and therefore benefit the students by giving them a well rounded practice from start to finish.

His Handstands Club class for example, is a four-week series that works on form, Simonalignment, and technique. Rather than just having students hop up into handstand against a wall, Simon works the areas of the body necessary in the advanced pose, and he works on them for the full four weeks. It’s a continuous series, and while the goal isn’t to perform handstand in four weeks, which is very unrealistic, he will get you pointed in the right direction to maybe one day to master the pose.

DIRECTIONS

Take the green line of the subway (Line 2) to stop #212, KSU (short for Kyungsung University) or 경성대학교 in Hangul. Go out Exit 5 and walk straight. Take your first left directly in front of Artbox. Walk two and a half blocks until you see a boutique called Zebra on your left (on the right is a yellow cafe [of course – there are a gazillion cafes in Busan] called Compose Coffee.) Walk into the building entrance which is just left of Zebra, and take the elevator to the 6th floor. There is no sign for Kaizen in the elevator, look for Man to Man Fitness in Hangul on a red sign for the 6th floor, which is what the studio was called before Mindy and Simon took over.


COST

Since classes at Kaizen are designed and taught in four week series it is best to buy a month’s pass. You can buy a 4 class pass to cover a specific class, say Simon’s Handstand Club, or you can buy a bigger quantity, or you can get a one-month-unlimited-membership pass which covers all classes. Visit this page for details on pricing. Drop in classes are 20,000 won (roughly $18.)

mindy&simonacro

Mindy and Simon of Kaizen, Busan.


Disclaimer: The reason that I have not written my Kaizen studio review for so long is because I was a stand in substitute teacher at Kaizen when trainings and workshops took Mindy hopping around the globe. Teaching at Kaizen then became a regular class in my teaching schedule. I felt it unprofessional to review the studio while teaching there, so am writing the review after my Busan departure.