Yoga for Diving & Snorkeling

20151223_132208.jpg
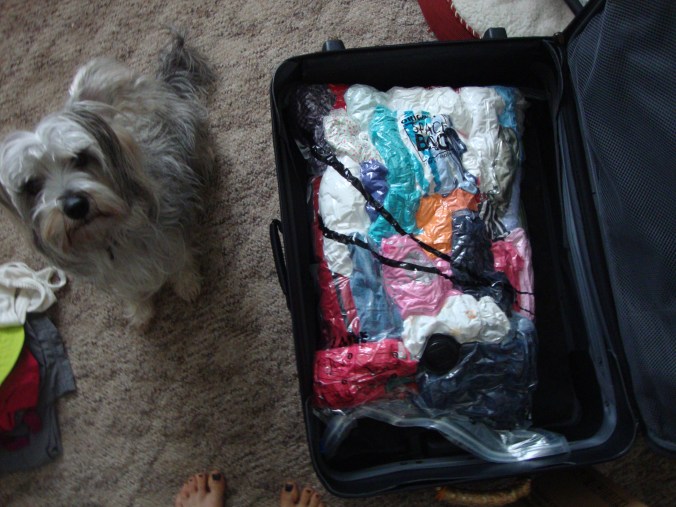
It is a beautiful thing to have the opportunity to delve into the seas and oceans to view and be with the fish, coral, and other beings that live below. On my recent trip to Panglao, a small island off of Bohol which is part of the thousands of islands that make up the Philippines, I packed my fins in my bag and got in the water to see some amazing sights. Blog post on those specific experiences in the future, but for now here are my pre-snorkel/pre-dive yoga tips.


Isolate

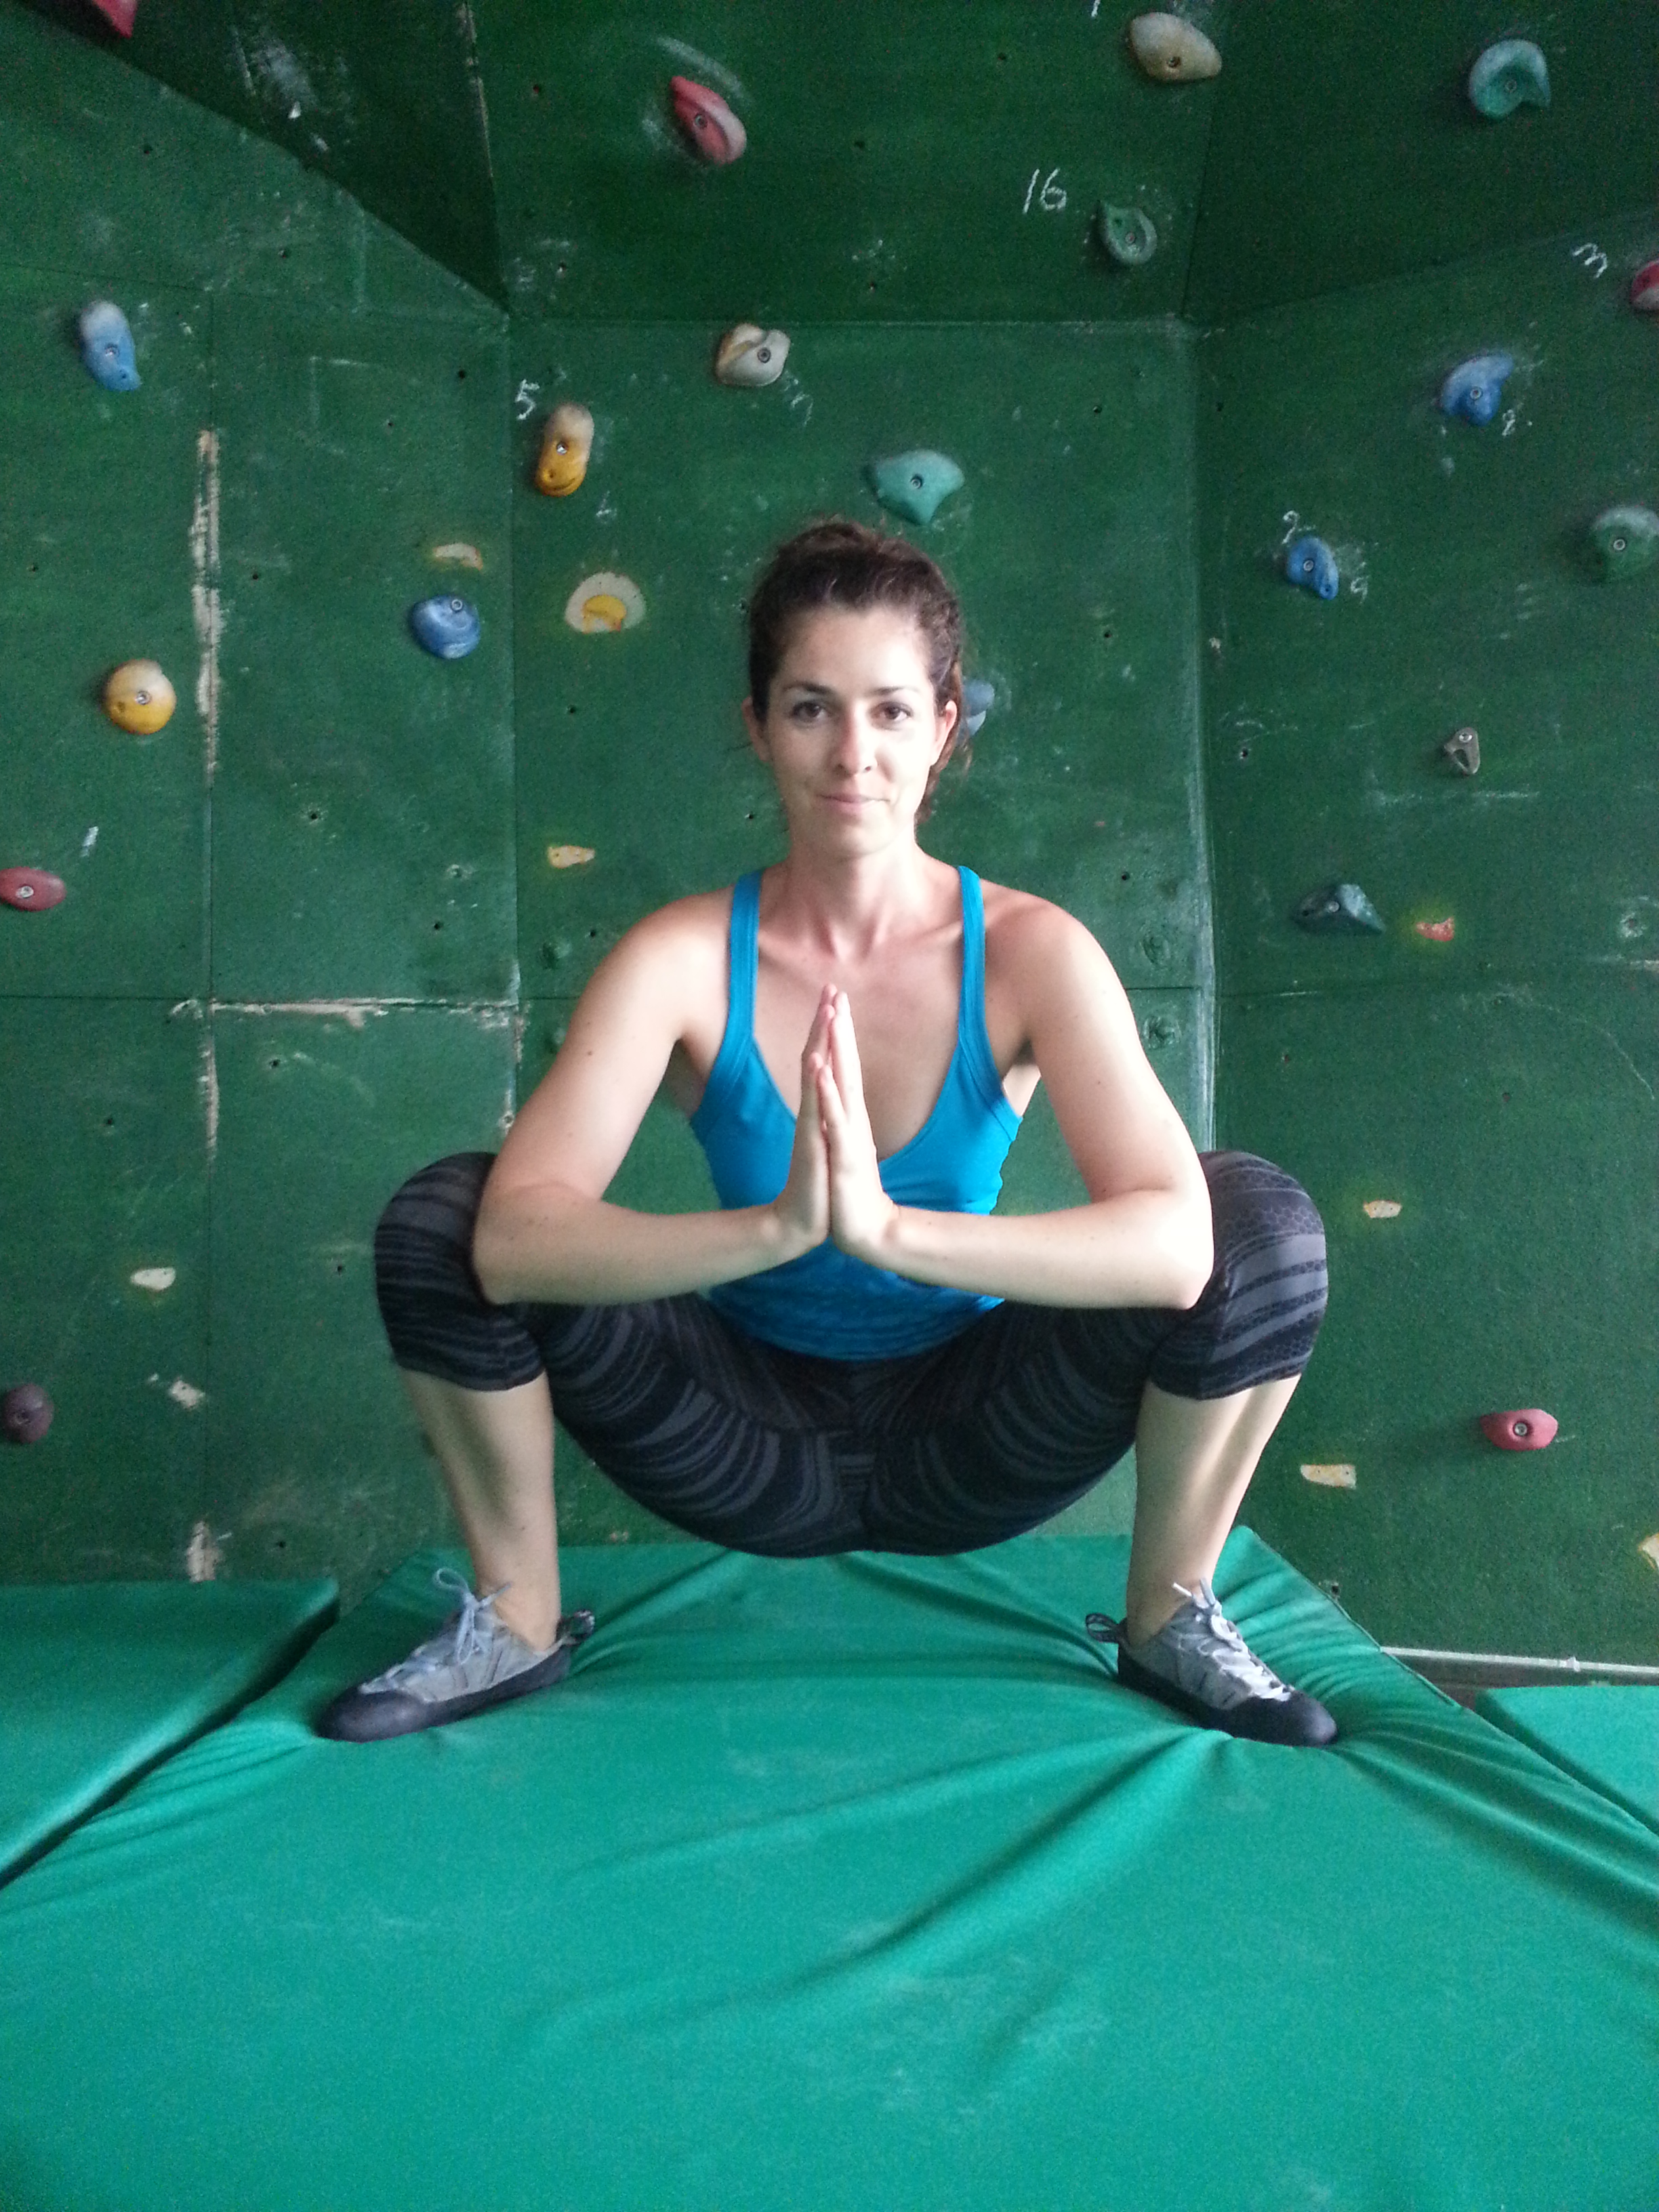
Because it’s all about those hips, bout those hips… and ankles. Focusing on twisting from side to side at your torso and hips will greatly improve your propulsion through the water with fins on. Here are some yoga asanas that will get your body twisted.

Torso Twists

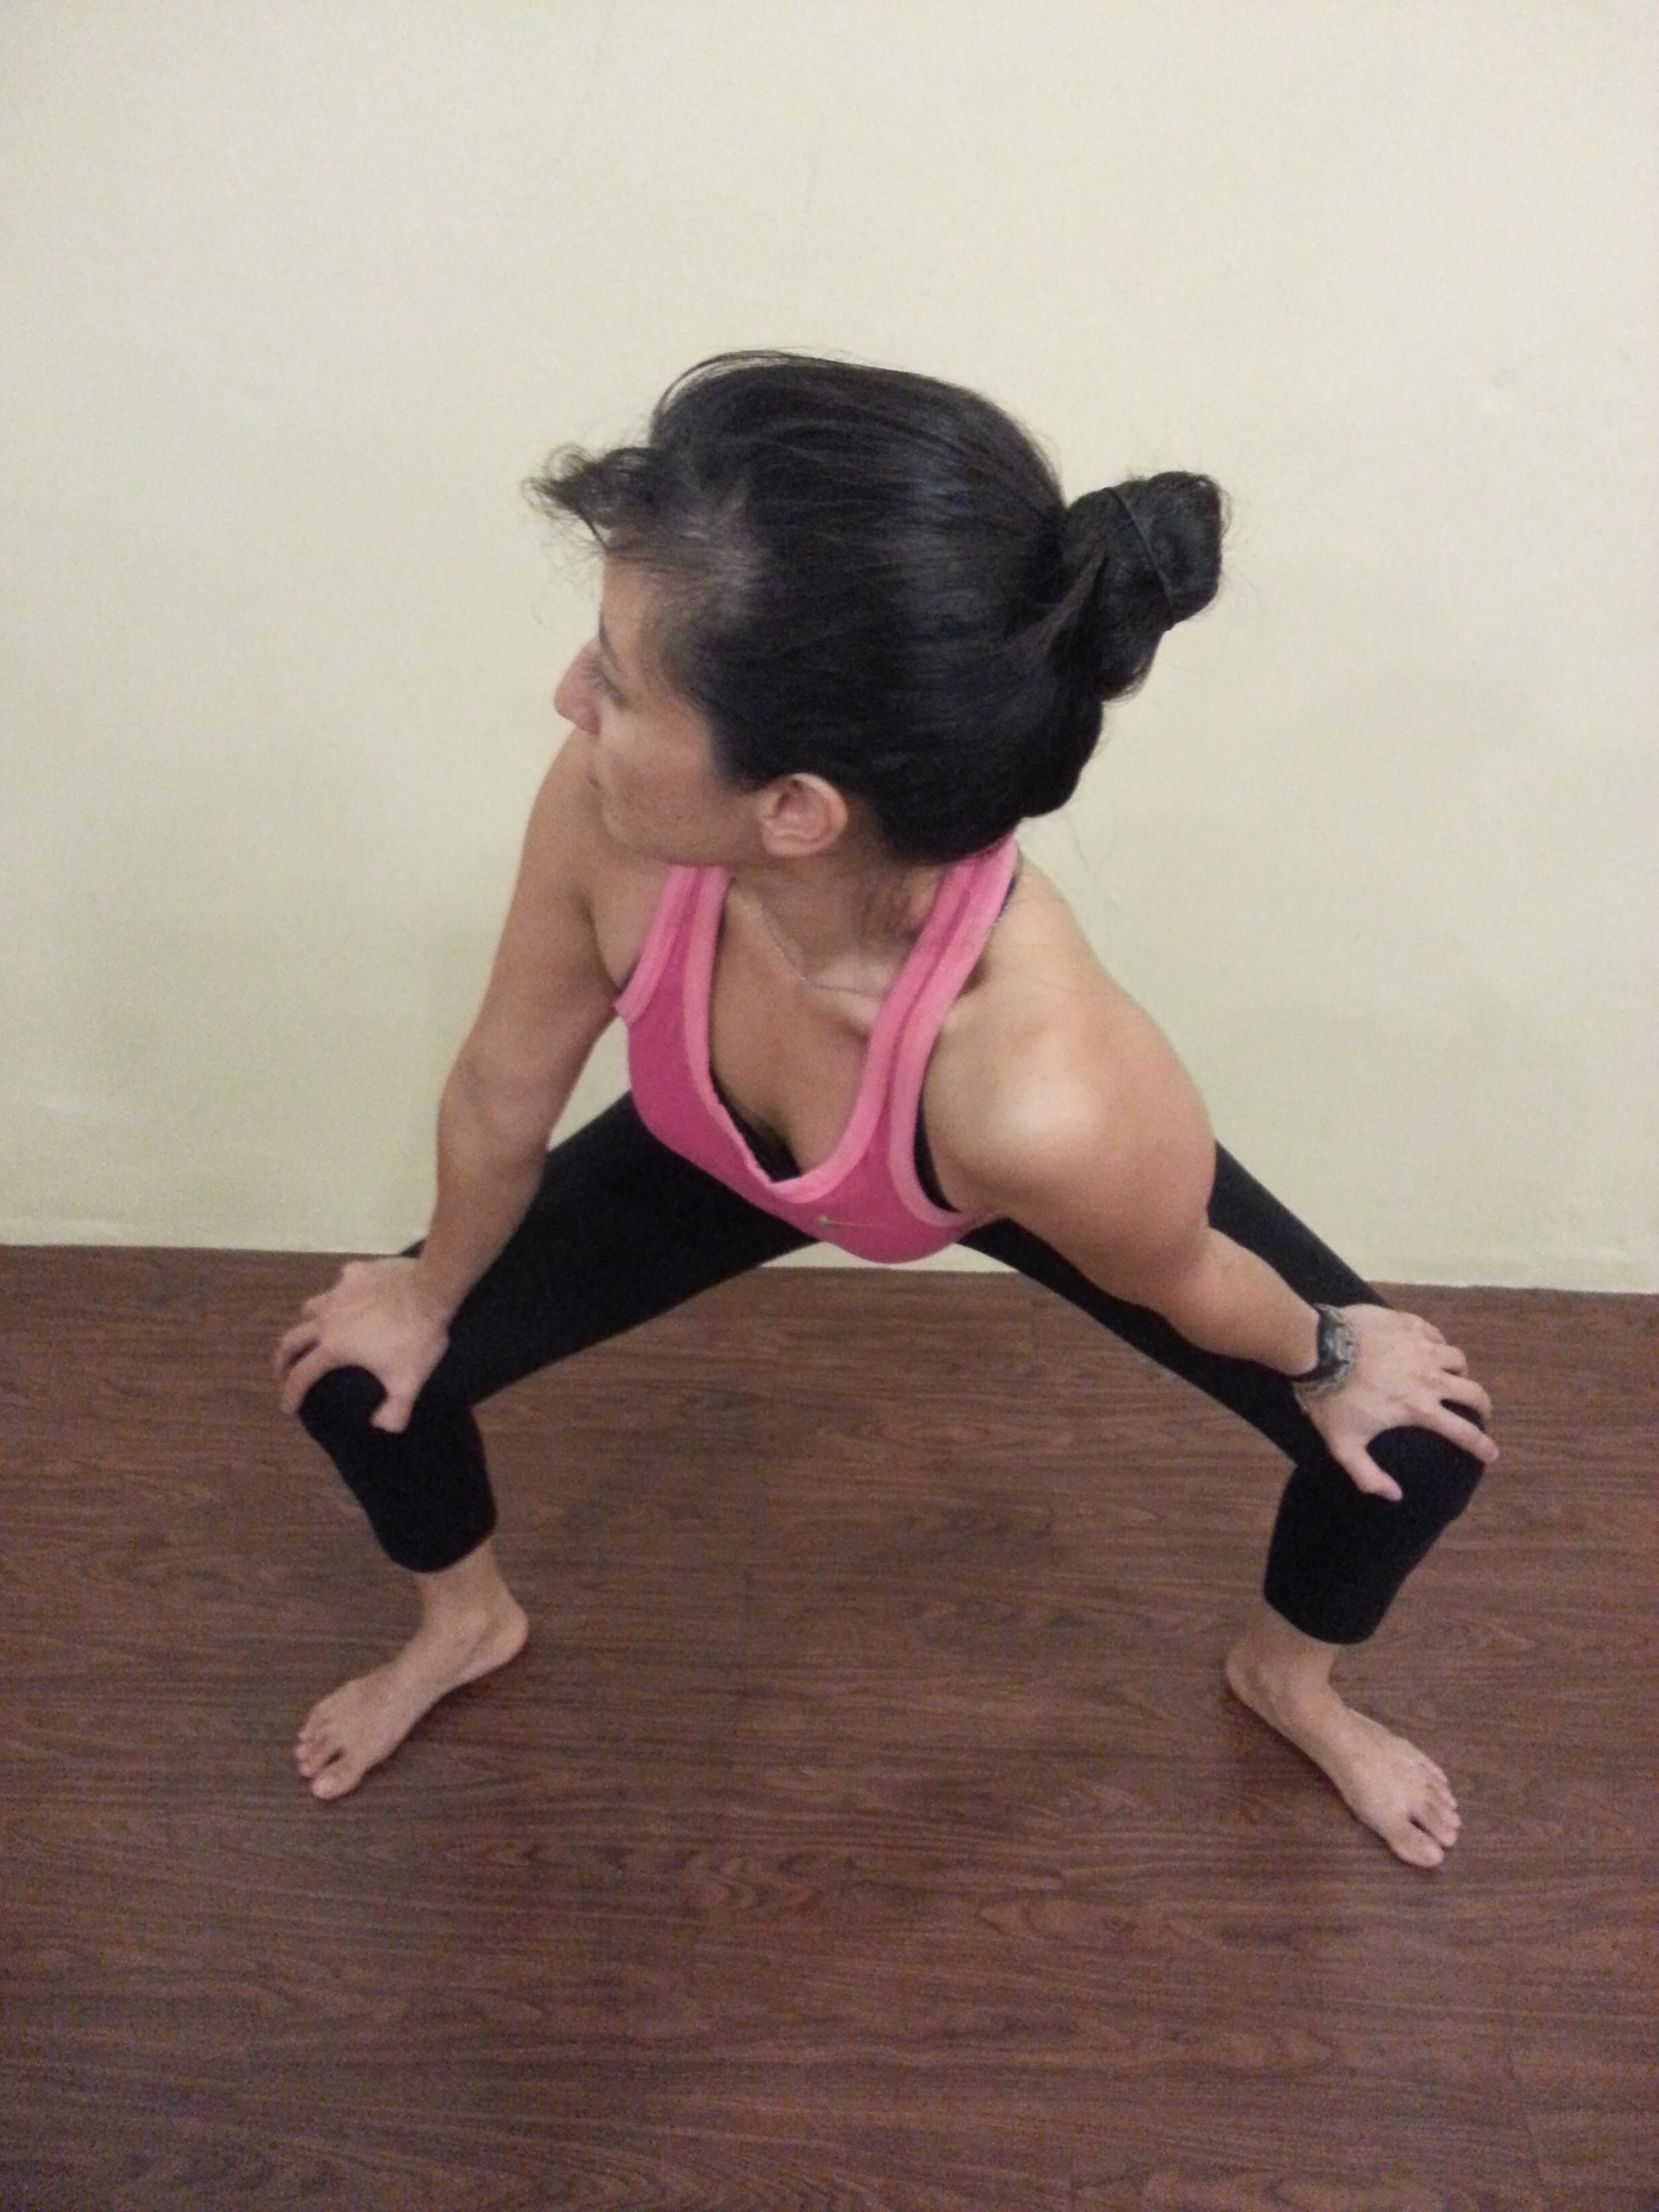
  • Sukhasana/Easy Seat Twist: Sit cross legged. Feel grounded through the sit bones, tall all the way up the spine and through the crown of the head, knees fall out to the side. Bring awareness to the breath for 30 second, making it long and calm. Then on an exhalation cross your left hand to your right knee and place your right fingertips back behind you. Stay and hold for 5 breaths. Inhale back to center and exhale to the left side. Hold 5 breaths. Continue for 3 rounds.

20160121_182009.jpg

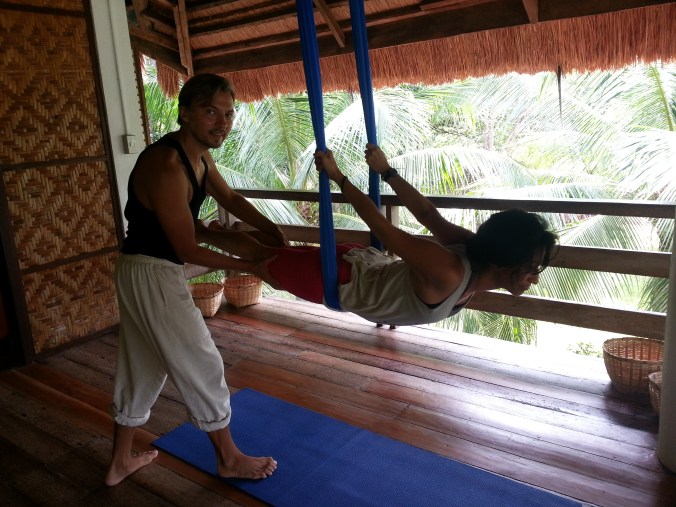
  • Anjaneyasana/Low/High Lunge Twist: From Downdog come into a low lunge, right foot forward, right knee directly over ankle. Lower your left knee to the mat, toes tucked. Bring your arms to your heart in prayer position. Inhale, lift your left elbow high to the sky, exhale and cross the left elbow to the right knee. Try not to crunch the left ribs, but instead create space there. Use the left elbow against the right knee for resistance and extension. Option to lift the left knee off the mat and extend the leg straight. Hold for 5 breaths. Switch sides.

20160121_182214.jpg

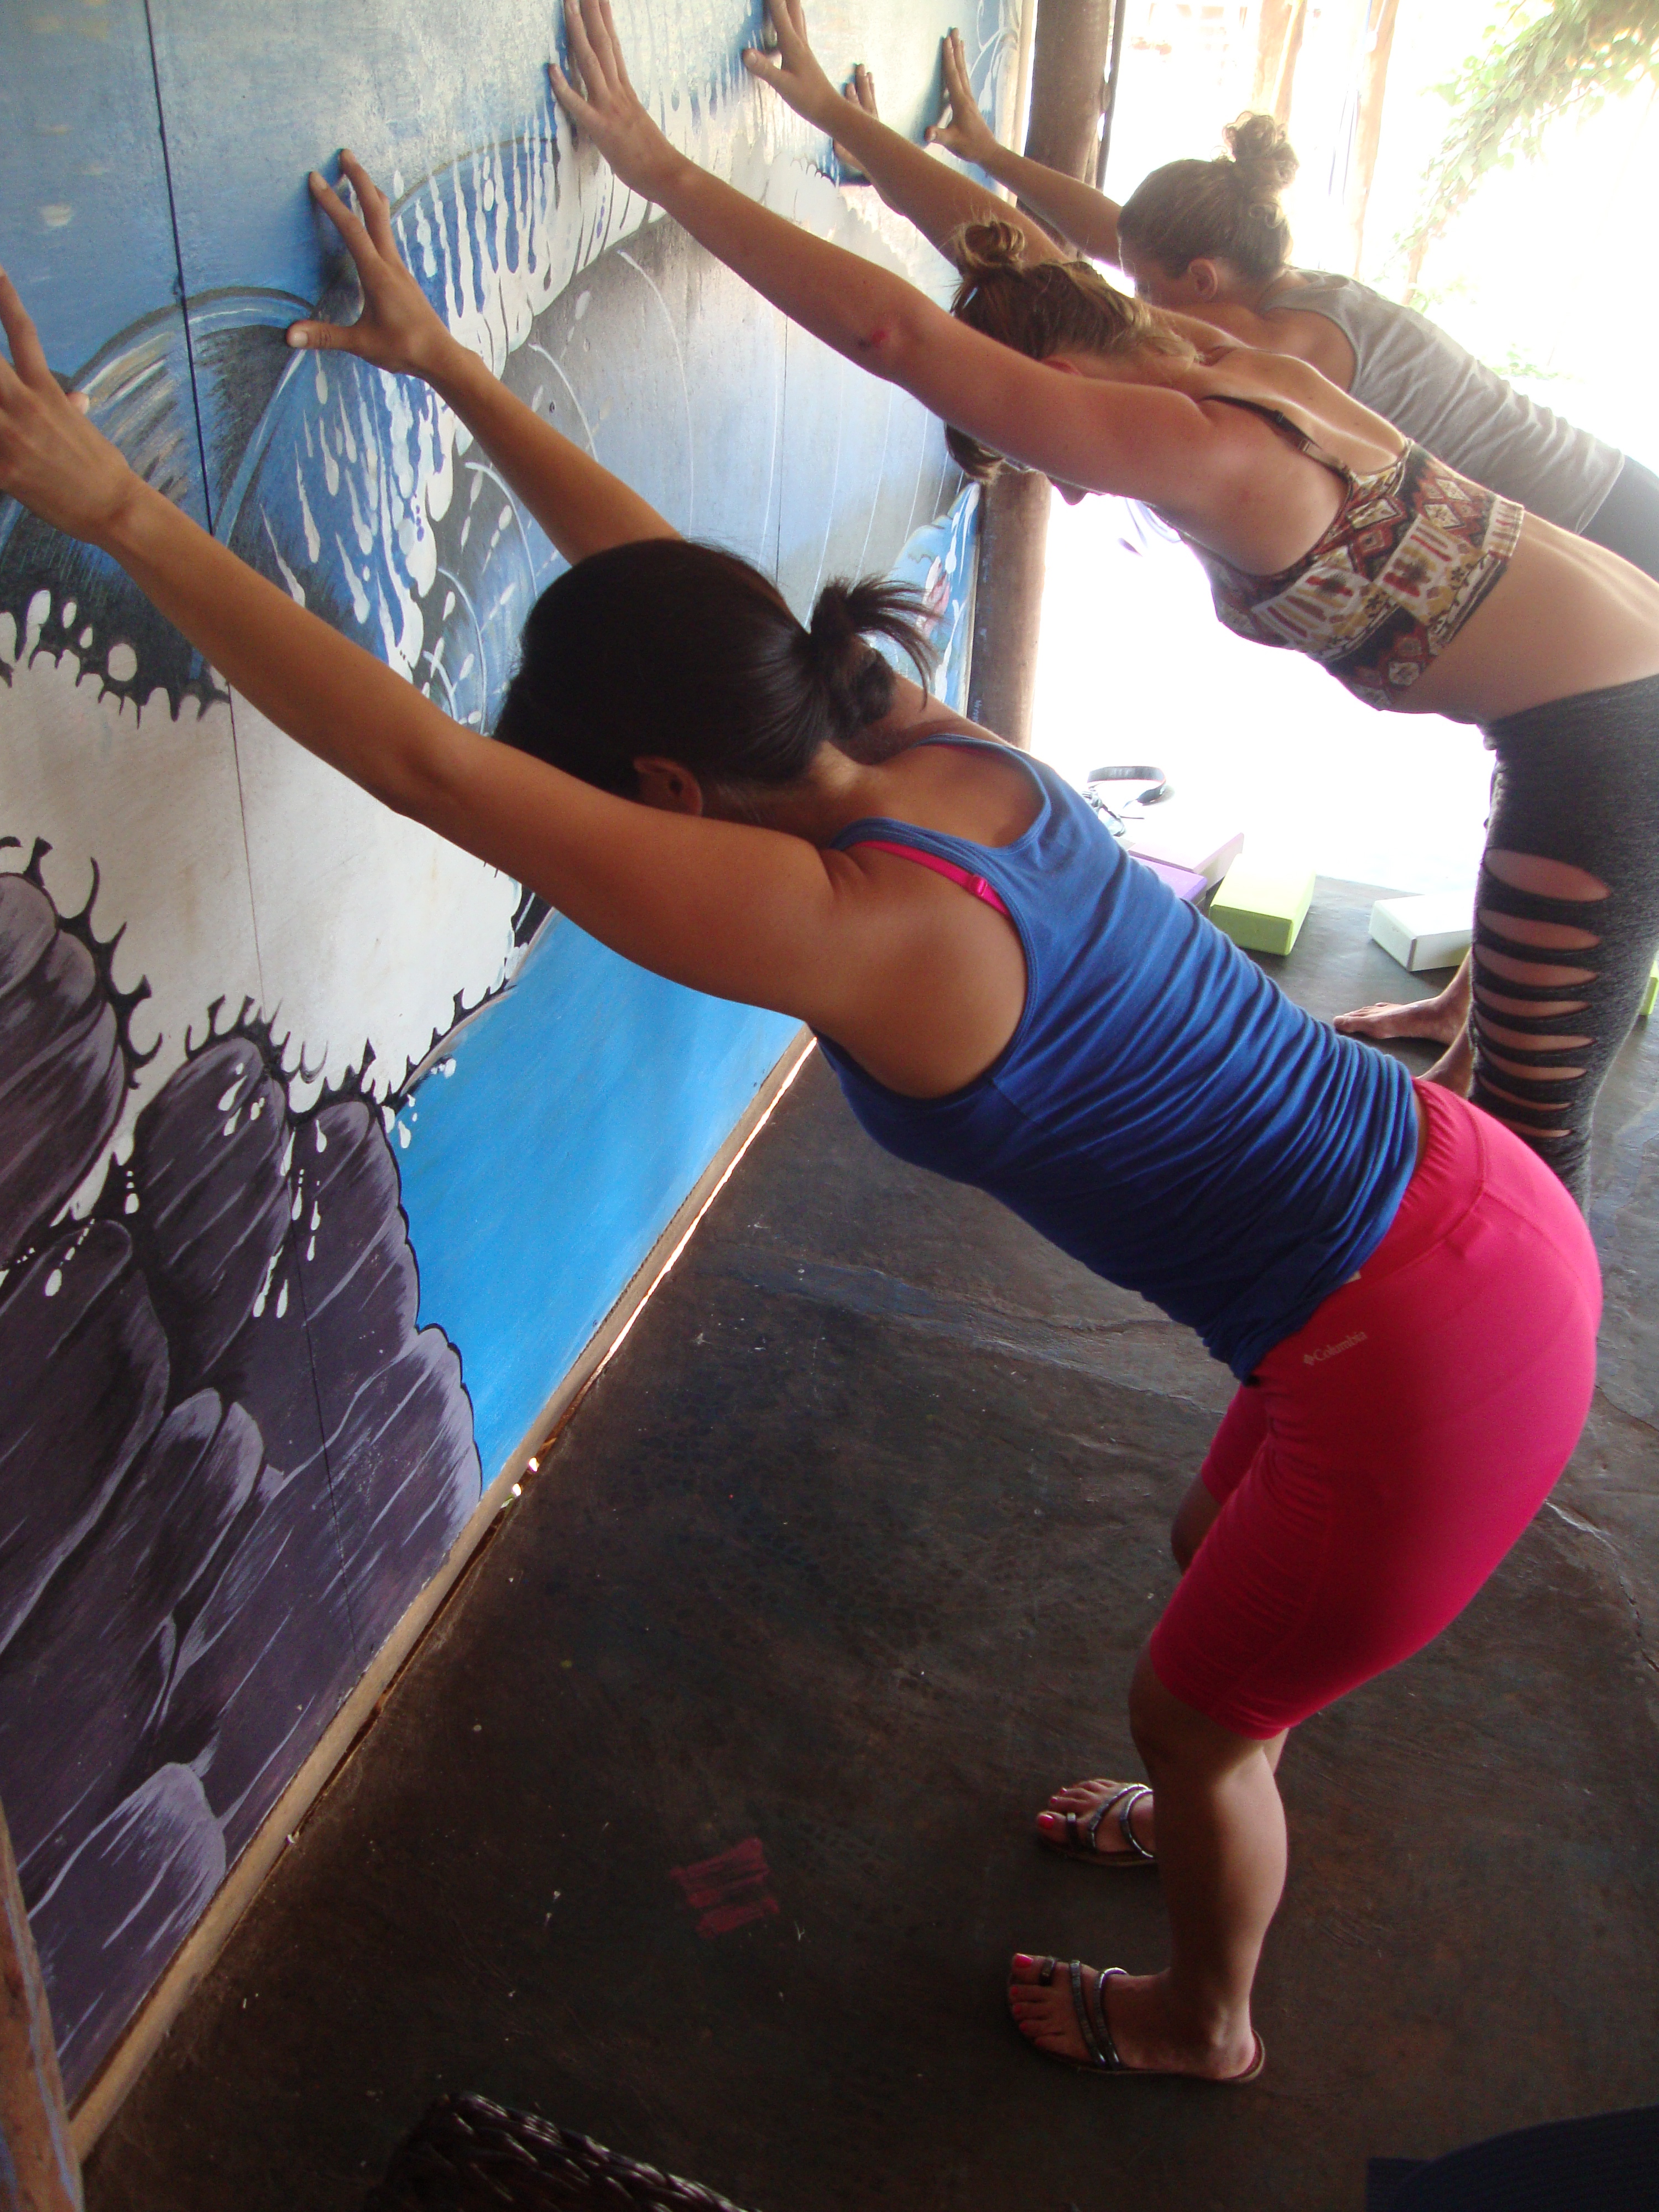
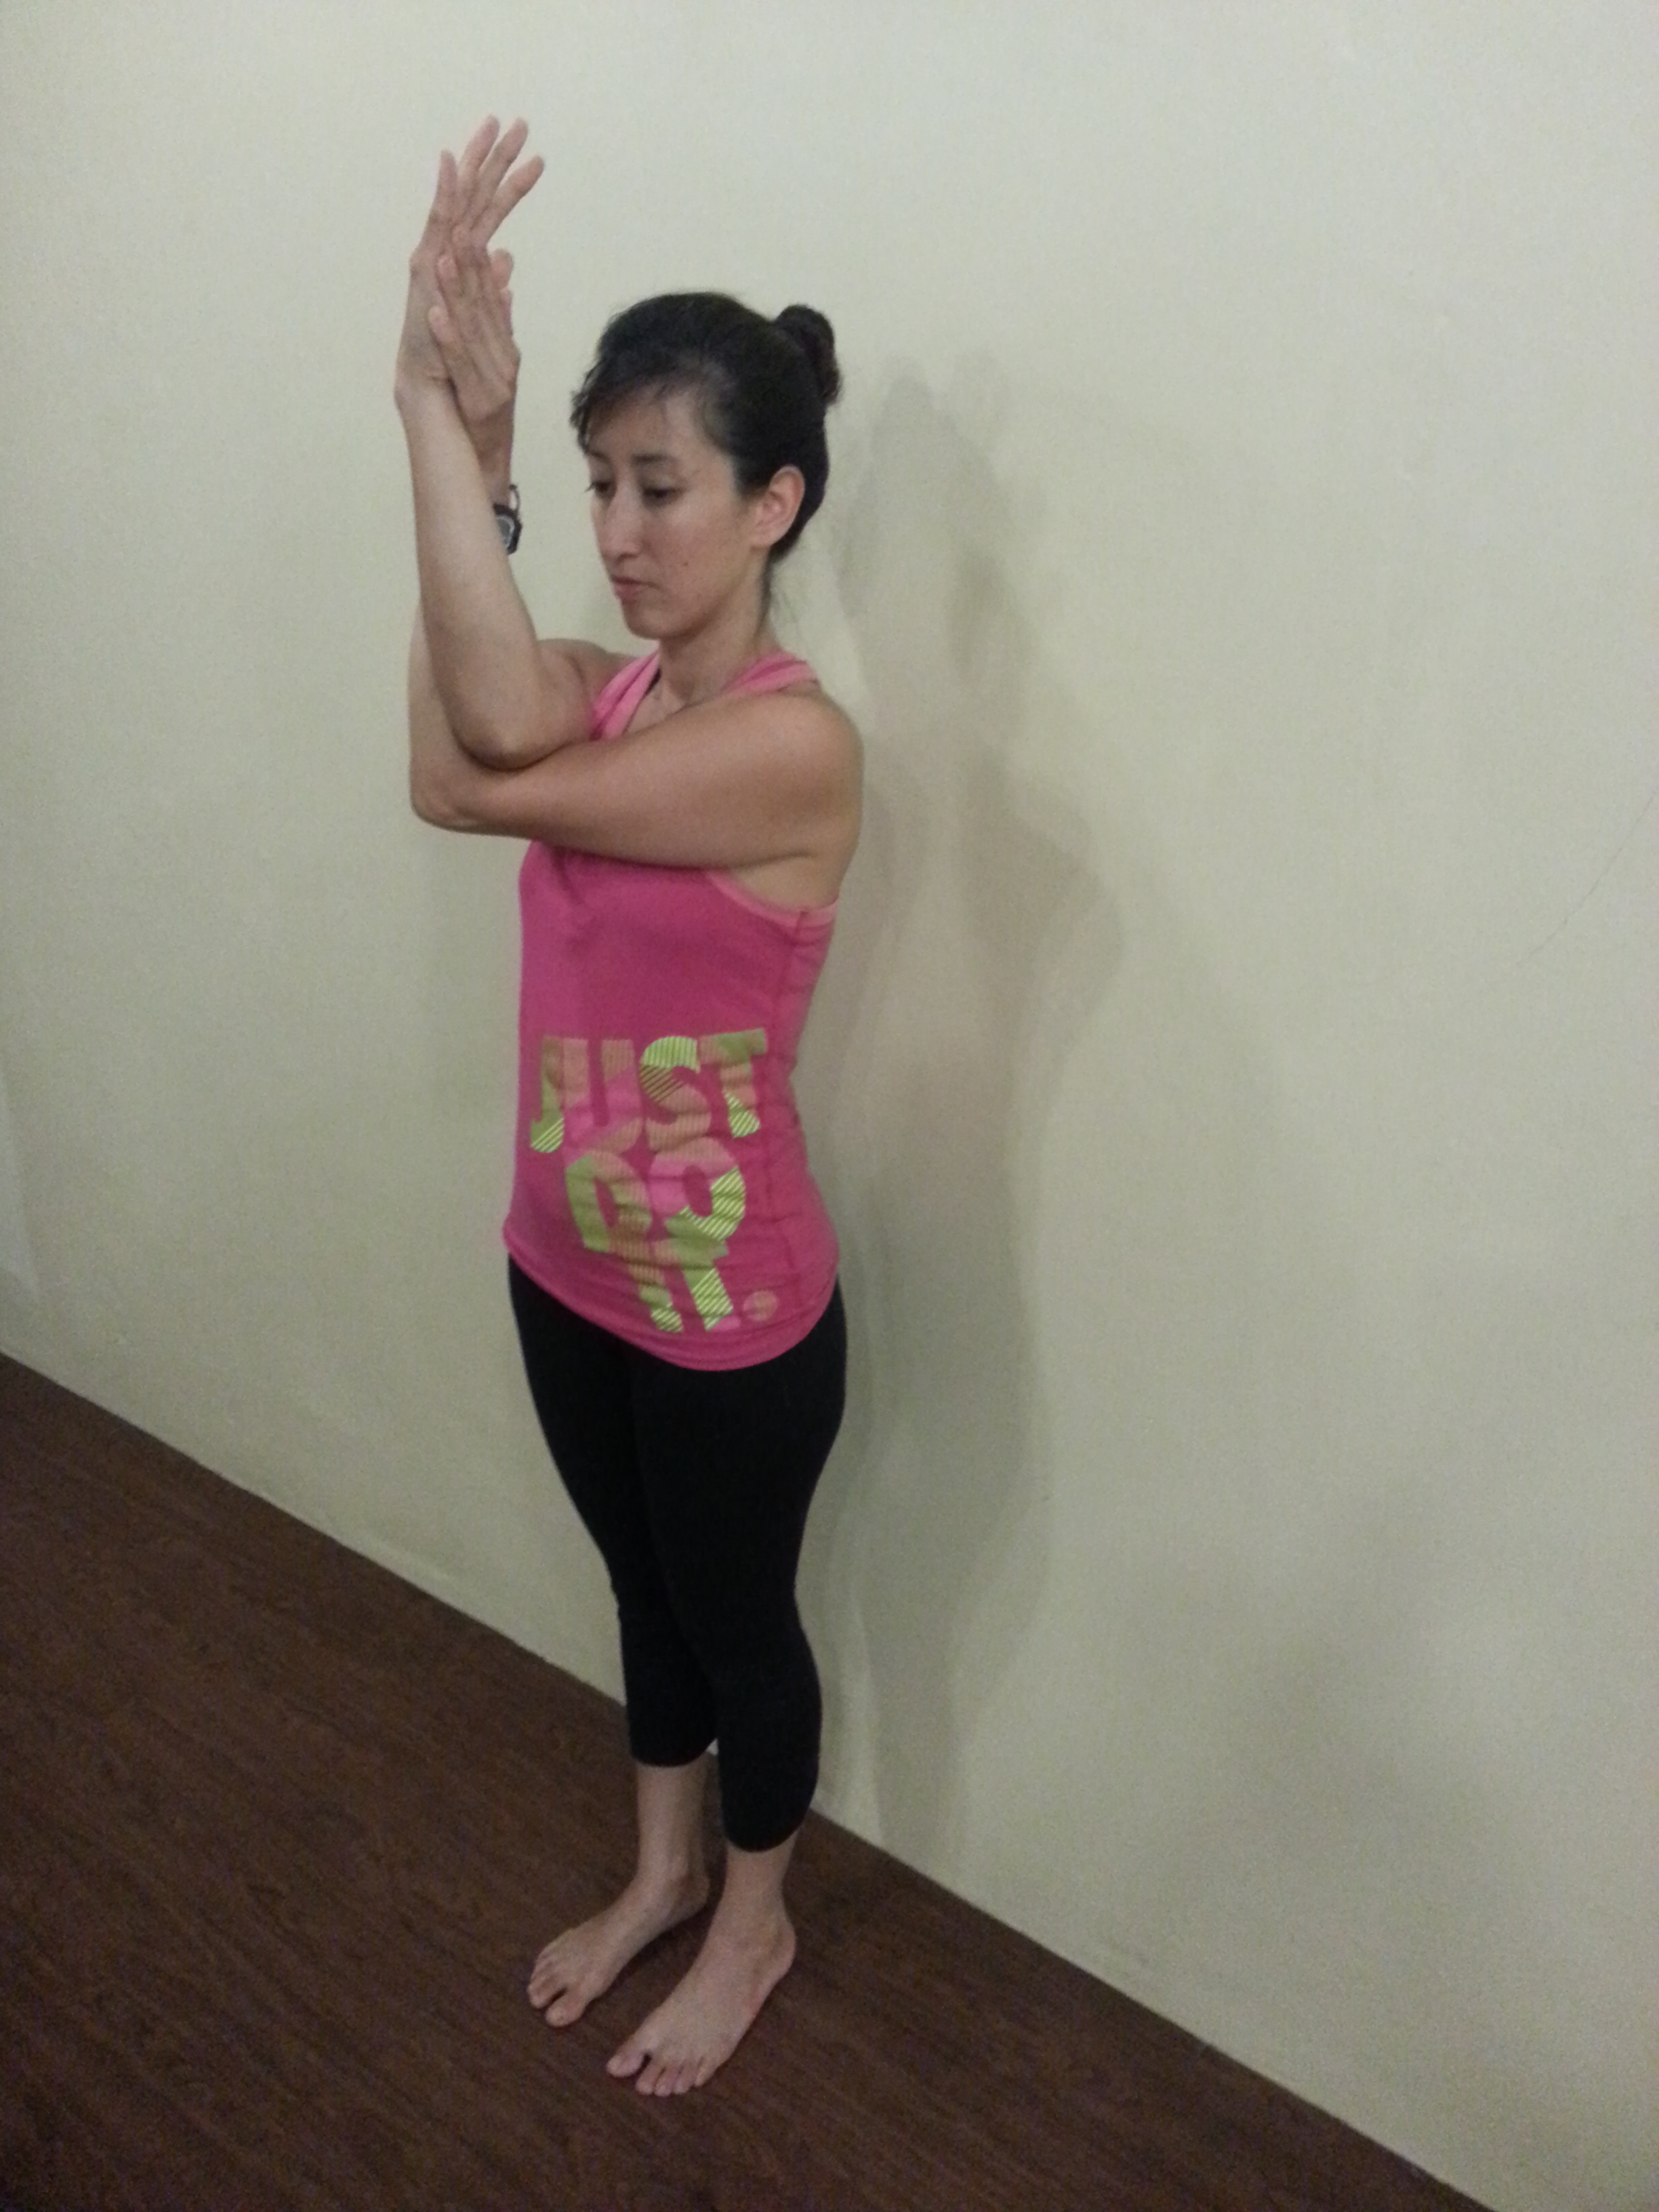
  • Dynamic Standing Twist: Stand with feet hip distance and a slight bend in both knees. Let your arms hang limp by your side, shoulders down your back. Inhale and twist left, swinging the arms with you so that the right arm gently hits the area of the left kidney. Inhale and twist to the right, this time the left arm hits the right back body in the space between the hip and ribs. Continue moving left and right while swinging the arms and gently hitting the back. Keep the bend in the knees the entire time. Focus on the twist coming from the abdominal area. This is the part of your body that you will mostly use when snorkeling. The fins makes it easy to move yourself through the water primarily from the torso twist, and when you have it down well you won’t even need to use the arms, freeing them up for your go-pro!

20160121_182024.jpg

Open Ankles

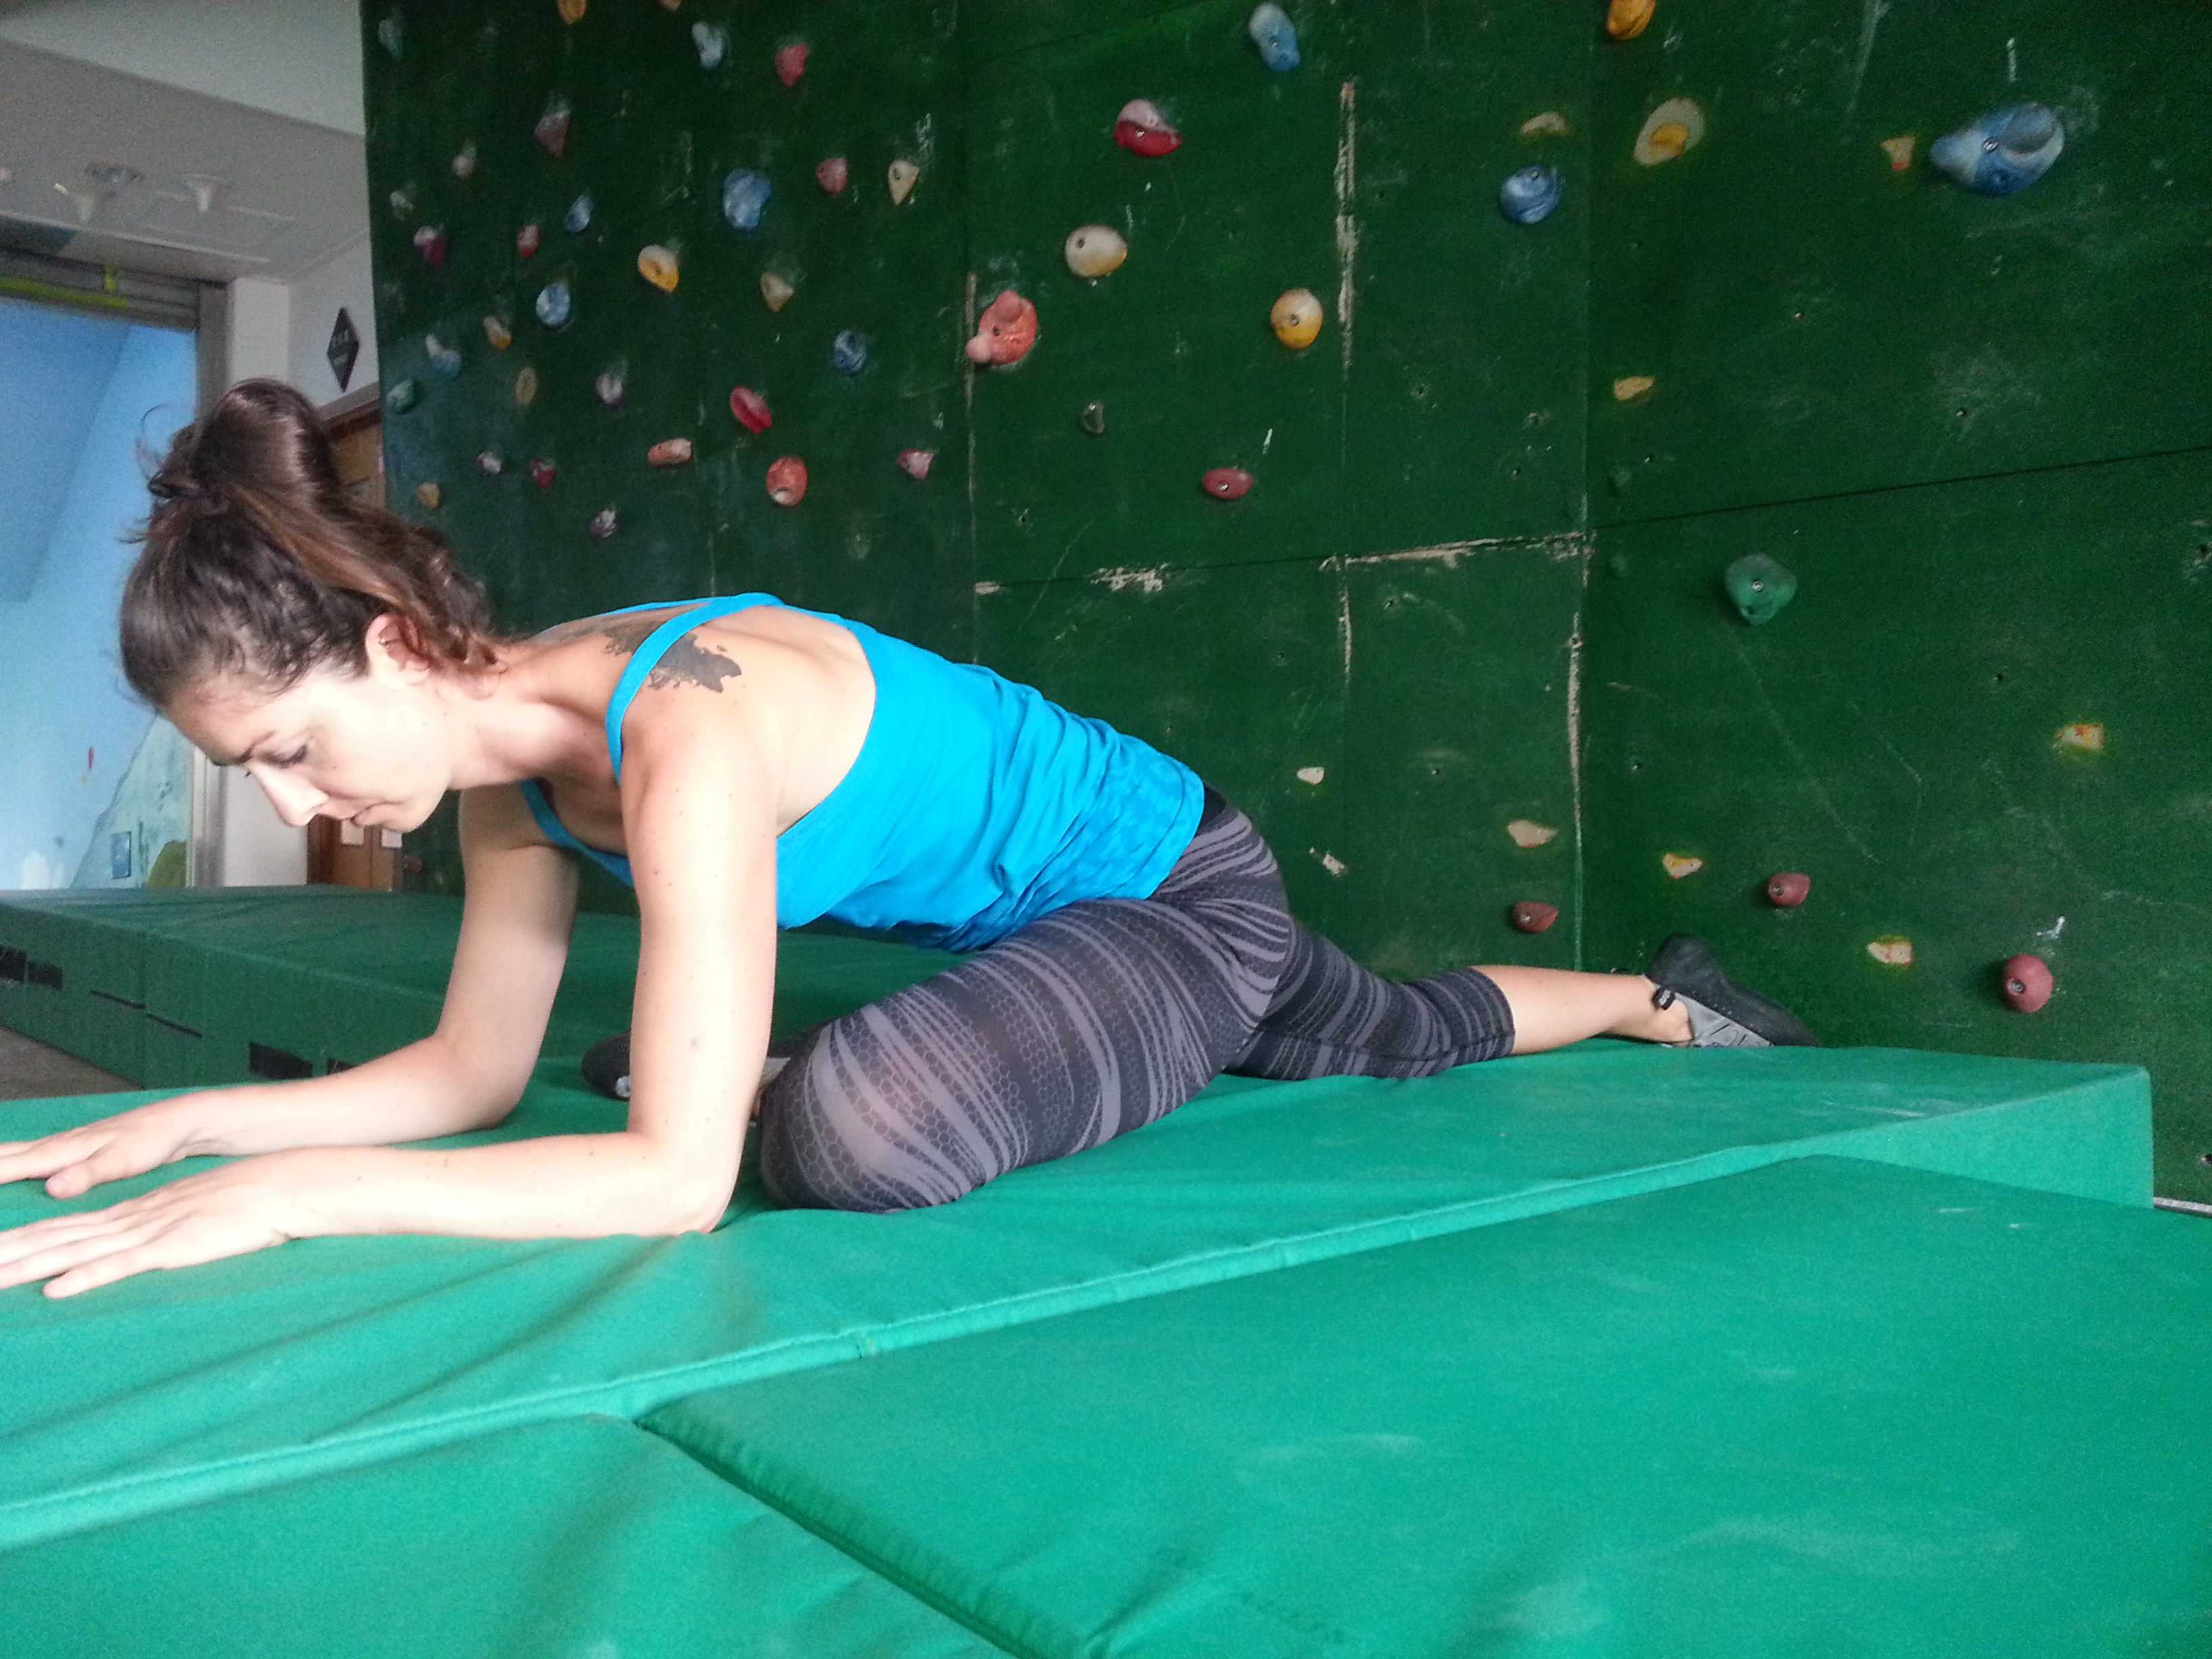
  • Adho Mukha Svanasana/Downdog Variation: Come in to Downdog, feet hip distance. Lift the right foot slightly off the floor, point the toes and cross the foot over the body to place the top of the toes (your toenails) to the left of your left foot. Breathe energy into the top foot and ankle area, where your shoe laces are. Switch sides after 5-10 breaths.

20160121_181949.jpg

  • Ardha Hanumanasana/Half Split Variation: Kneel on your knees and swing your right foot out front, don’t let the right hip change position when you do this, make sure that it stays in line with the left hip. Flex the right heel and lower the hands to blocks or the floor. Breathe to stretch the back of the leg. After 3 breaths, extend the right toes to the floor, hold and breathe for 5 breaths. Repeat on the left side. Opening the top of the foot, front ankle area will increase the effectiveness of your fin use while snorkeling or diving.

20160121_182111.jpg

Breathwork to Calm the Mind

  • Slow it Down: I often instruct students to lengthen their breath at the very beginning of class and to attempt to keep their breath at the long and steady pace during the entire class, no matter how challenging the poses become. The same technique can improve your diving & snorkeling, because although it’s a beautiful and tranquil world down there, feelings of stress and anxiety can arise by putting yourself in a whole new environment.
    • Slow Breath: Before getting in the water sit, or stand and breathe as slowly as you can. Begin breathing just through the nose like you do for yoga.
    • Diving/Snorkeling Breath: While diving & snorkeling you will breathe only through your mouthpiece for an extended length of time and venturing into the unknown vastness of the deep deep ocean can sometimes cause panic. Practice lengthening the breath, and especially lengthen the exhalation. Make the exhalation longer than the inhalation which lowers the heart rate, calming you down. Do this only through the mouth only for a few breaths to stimulate the mouthpiece, or do it right when you enter the water with the mouthpiece already on. When diving, use the deep breath only as a calming technique and ask your instructor for the appropriate breaths to be taking during the dive as you don’t want to suck up your tank too quickly!

20151227_111750.jpg

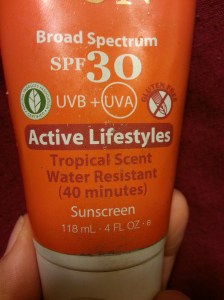
Have a great time exploring the surface and depths of the beauty below. For tips on how to keep coral safe while snorkeling, read this blog post about eco-packing which includes tips for the harsh sun and against harsh sunscreens that can cause coral bleaching.


My Flying Yoga Experience

Flying yoga (also known as anti-gravity yoga/aerial yoga) is a trendy style of yoga that until recently I had never attempted. Luckily though, while on vacation in the Philippines, I learned of a class happening at the Yoga Barn Panglao and excitedly signed up.

Fellow karabemisyoga blogger, Amy Steele, came along for the class and it ended up being just the two of us in the morning Flying Yoga class that as of then was not yet added to their regular class schedule. Our teacher that morning was Alex Kuznetsov from Russia. Alex was patient and attentive as a teacher and demoed the entire class so that we could follow along. He then adjusted if needed.

20151229_112859.jpg

Teacher Alex stopping my falling angel from falling so much!

Here are my observations of my first flying yoga class:

  • It’s difficult – I went into the class not really knowing what to expect, but the second we started using the hammock for our warm up sun salutes I felt the burn. Having an extremity, or limb, lifted off of the ground means using your core to balance and keep from falling over. The hammock also offered some resistance that doesn’t usually come with basic standing poses. I found that my muscles were shaking like jelly in poses that are usually very comfortable for me, like Virabhadrasana 2.
  • It’s a prop – The hammock used in flying yoga is essentially a prop that switches up your regular yoga practice. At times the pressure of the hammock felt uncomfrtable against skin and bone, but Alex reassured us that that feeling was normal and would begin to fade away with more practice. I noticed as well that the hammock applied extra pressure that sometimes felt beneficial, such as in Vrksasana. I felt a strong pressure on the sole of my standing foot that felt similar to reflexology.
20151229_112830.jpg

(Uprooted) Vrksasana

  • It encourages engagement – The core is engaged for balance and deeper, more intrinsic muscles tighten up while pulling the legs together to stay upright. For example, in high lunge where the front knee is bent over the hammock, engaging my muscles a lot was necessary so that I could keep the form.
  • It’s beautiful – Although I struggled to get into certain poses, once in them, I did truly feel like I was “flying.” Doing Badha Konasana, or any other pose, while floating two feet above the ground is invigorating. Of course there are plenty of opportunities to snap some instagram worthy pics.
20151229_113035.jpg

Amy and Teacher Alex in Badha Konasana.

  • Relax in that hammock – It’s called a hammock because it’s a hammock, and we all know that hammocks beckon us over to have a doze. At the end of our class Alex guided us in relaxing, longer-held poses. The heat of the island and the sounds of nature could have easily lulled me to sleep in my big blue hammock, but I refrained from slumber.
20151229_113141.jpg

Seated variation of Badha Konasana with tropical palm tree view.


Flying yoga is a fun supplement to a regular yoga practice. There are many benefits to this style of yoga and at the very least it will reinvigorate standard poses that may have lost their luster from years of practice.


Go to Yoga Barn Panglao’s website or their Facebook page to keep your eyes out for future Flying Yoga classes with Alex Kuznetsov.

20151229_113545.jpg

2015 in review, report by wordpress

The WordPress.com stats helper monkeys prepared a 2015 annual report for this humble little blog.

It’s been just over a year that I’ve been sharing my thoughts, ideas,  and inspirations. Thank you to everyone who clicked and read.

I’m very much looking forward to continue sharing in 2016!

Here’s an excerpt from karabemisyoga’s 2015 report:

A New York City subway train holds 1,200 people. This blog was viewed about 3,900 times in 2015. If it were a NYC subway train, it would take about 3 trips to carry that many people.

Click here to see the complete report.

Top 4 Yoga Study Tips

So much more than being a yoga teacher, I am a yoga student. There is so much to learn about yoga, and you don’t have to be a yoga teacher to delve in. There are thousands of years of yogic history, philosophy and knowledge that cannot all be learned in any YTTC.

As a teacher, I strive to learn more and more about the human body and it’s movements and interweaving, working systems. This means studying human anatomy. Muscles, bones, and the like.

On top of the physical aspect of yoga there is a whole new language to learn – Sanskrit.

The list could go on, so to aid your study of yoga, here are four of my top yoga resources that I use to increase my understanding of yoga.

  • TIP ONE – ANATOMY COLORING BOOK – My trainer, Kimberly Waugh of Radiant Life Yoga School, had recommended that I get a coloring anatomy book during my YTTC exit interview back in 2013 when I asked her for advice on how to self-study anatomy. I don’t know why I didn’t take her advice right away, instead I only just recently purchased my coloring book and instantly fell in love. It’s stress reducing and educational at the same time! Grab your own and get to coloring… just one tip – get the big box of coloring pencils, minimum 24 pack.
img_20151007_190442.jpg

Netter’s Anatomy Coloring Book, 2nd Ed

  • TIP TWO – LEARN THROUGH YOUR EARS – I. Love. Podcasts. Many of my conversations begin like this, “I was listening to this podcast about (fill in the blank) and …” I subscribe to an array of them and am open to expanding my list. My favorite all time yoga podcast though is Yoga Body – The Yoga Talk Show by Lucas Rockwood. Episodes include interesting interviewees not only from the yoga world but from all areas of the health and wellness industries. Every show also includes a questions and answers segment with Lucas and a Nutritional Tip of the Week. Get this app.

ybn2


  • TIP THREE – FLASH CARDS – Be traditional and make your own, or try this flash cards app: AnkiApp. This app is new to me but I’ve already studied with it quite a lot. You search topics, choose a deck you like, download it to your app and start flipping. They even have flash cards specific to yoga.
screenshot_2015-12-20-13-40-43.png

AnkiApp, English/Sanskrit Pose Names

  • TIP FOUR – CREATE A STUDY GROUP – Ask fellow yoga students and/or teachers to study with you. Share resources and help commit each other to study dates and times. Claim a large table at a cafe, spread it all, sip some herbal tea and study.

img_20151121_125110.jpg

Changing your perspective of yoga from just a practice to a study of yoga will deepen your experience. Once you open that portal you’ll realize that there’s so much to learn and with that learning your practice will evolve.


*If your studying is taking you to a retreat or teacher training, then check out one of my first blog posts full of how to start the process of choosing the right YTTC for you.

My Guide to Packing for Beach Vacations

It’s holiday time which means vacation time here in Korea, which of course means travel to other parts of Asia for many expats. This year I’ll be packing my backpack for a 10 day trip to Panglao, Bohol in The Philippines.

This will be my second visit to The Philippines, a beautifully romantic, tropical place made up of thousands of islands. The Philippines is home to great  dive spots and stunning beaches, not to mention very friendly people. On my last trip, my boyfriend and I snorkeled twice daily, seeing stunning sea turtles and swarms of sardines. This trip I plan to snorkel again as well, and so am being mindful about what to pack.

Beach sunset (Nicaragua)

Beach sunset

When taking a beach vacation, especially one in which you plan to spend a lot of time in the water, it’s important to consider the lasting effect you and the items you bring with you might have on the environment. For your next beach trip, give some thought to what you bring, wear, and leave behind.

Do your part when packing to make your footprint as small as possible.
  • SUN PROTECTION – Sunscreen: Not all sunscreens are created equal, do a little research and find a product that is labeled reef safe, especially if you plan to swim, snorkel, SUP, or dive. Some chemicals in sunscreen (oxybenzone) damage reefs and marine life, avoid screens containing the chemical and opt instead for more natural products that contain zinc oxide.
  • SUN PROTECTION – Cover Up: Get a rash guard. Rash guards are thin, breathable tops worn over swimsuits or in warm waters for surf and other water activities to protect against harmful UV rays. As much as I prefer natural fibers for my clothes, when it comes to active and performance wear, synthetics perform best. Buy quality and treat your clothes with care for an extended and purposeful product life. Bring a small cap or beach hat for your trip, too; sunglasses are great for protecting the eyes, but hats will keep rays off of your face and will therefore be cooling.
20151213_140232.jpg

Hat and rash guard.

  • FROM THE SHOWER TO THE SEA – Pack Wise Toiletries: Just like sunscreen, other toiletries that you bring on your trip with you are potentially harmful to the environmental. Bring, or DIY your own shampoos, conditioners, lotions, soaps, cosmetics, toothpaste and more that are paraben-free (a common, dangerous preservative.) Making this extra effort is especially important when staying at eco-lodges or resorts where the gray water (water from showers/laundry/washing) runs straight back into the environment. Some mindful accommodations even require that you bring only safe products with you.
20151213_140354.jpg

Without… PARABENS

  • REDUCE PLASTIC – Bring a Tumbler: The Philippines is one of the top five producers of plastic ocean pollution in the world and I do not want to contribute to that statistic while visiting, so I’ll be bringing a metal, reusable water bottle and my trusty tumbler with me. Potable water is not always easily found in remote places, so bottled water becomes the norm. Bringing a personal, filtering, reusable water bottle might be a solution for the brave. Other options include iodine drops or this LED purifier I’ve recently learned about. My boyfriend and I traveled Costa Rica & Nicaragua for a month with a filtering water bottle and had no problems.
Tumbler

My well-weathered tumbler!

  • LEAVE A POSITIVE PRINT – Donate: Backpacking is a basic way to travel the world, I say basic because you have to edit your packing list again, and again to get it all to fit into a 40 liter pack that you will then carry with you – everywhere. Packing light is a necessity when it comes to backpacking, but if you’re traveling internationally and get a baggage allowance that comes with your ticket, then consider packing a second suitcase of donations for your intended location. Get in touch with an organization ahead of time so you can drop them off at the beginning of your trip. Collect used clothing  or other needed items from friends and relatives. Tip – plan to wear some donations during your trip and leave them at the end to decrease your packing load.
DSC03339

Donations that went with me to my YTTC in Nicaragua, modeling with them is Pepper.

This is just a short list of packing tips, concentrating on conscious/eco travel. Be sure to read your toiletries and cosmetics labels the same way that you read your food labels, and ditch the generic for greener items, or DIY some baking soda toothpaste. Then, relax on the beach, knowing that you have done a small part in reducing ocean pollution!

Ethical Shopping this Holiday Season

We’re all guilty of letting time slip buy and having to quickly grab something for someone as a gift during the busy holiday season. This year may you take your time, start early, and shift from mindless consumption to being a little more conscious of the sources of what you buy as well as where it comes from, how it was made, and who made it.

Do your research and look for craft shows, privately owned boutiques, or shop ethically online. You can opt for buying from a small producer made in your area or find a big name company that functions ethically.

Top Reasons Why Ethical Shopping is Much Better Than Mindless Consumerism:

  • Support Local – Imagine if most everyone supported a local artisan by gifting from them rather than a piece of plastic something-or-other bought at any old box store, it would be amazing. The artisan would be financially supported and continue their work, the gift giver could smile knowing they’ve spent their money well, and the receiver would get something unique to enjoy.
  • Good for the Earth – You have control over what products you support. Opt for natural, handmade products instead of off the shelf generic. Some examples are soaps, candles, beauty products, baked goods, and more. You’ll bypass the unpronounceable additives for a more natural product. You can of course shop online at Etsy or try Amazon’s new line Handmade if you don’t have local crafted goods near you.

Mama's Binoo Soap

  • Less Packaging – Take your reusable bags when shopping markets or shops and pass on the plastic. Be thoughtful about any packaging, politely decline boxes and plastic containers if they can be avoided and aren’t necessary in keeping the product safe from damage. When wrapping gifts, use boxes from your recycling and newspaper as wrapping. You might even find companies that are consciously packaging.
  • Support Ethical Work – Seek out local or commercial companies that treat their labor fairly. Find a slow fashion producer, buy fair trade products, and look for companies who give back to both their employes and the land and oceans, like Teva who runs a project called A PAIR FOR A FOOT, for every pair of shoes it sells the company commits to cleaning a linear foot of shoreline.

Have fun shopping ethically, and share your finds with friends and family to encourage them to do the same. We have power as consumers to support fair, ethical, and environmental practices. What ethical goodies have you found near you?


*Here are two events happening in Busan where you can purchase ethical gifts:

  • Holiday Trunk Show, Nov 22 4PM (Slow Fashion)
  • BIWA Christmas Charity Bazaar, Dec 5 10AM-4PM

12190980_970856362976254_474606765961813179_n

Hygge Yoga

Hygge (hooga) is popping up everywhere this winter season, but if you’re looking at that mashup of consonants with a furrowed brow let me explain it a bit. The word is Danish and expresses an idea of warm & cozy during the winter months. Take a moment, close your eyes, and think of what makes you feel warm & cozy on a dark, cold winter night. Candles? Christmas lights? Hot chocolate? Reading in sweatpants under a blanket? That’s hygge.

As someone who generally dislikes winter and would much rather be on a hot beach than on the slopes I received the idea of hygge with big open arms. I’m comfortable self diagnosing that I suffer slightly from SAD – seasonally affective disorder, or in my case – being grumpy and mopey in the winter.  So when I recently learned of the idea of hygge, I embraced it completely and began to prominently incorporate it into my yoga classes.

Here’s how to have a fantastically hygge yoga:

  • small talk – It can be common to go to a yoga class as a student and not speak with anyone the majority of the time that you’re there. A major part of warding off the winter blues is to create a sense of community, so make an effort to talk with some fellow students or the teacher. Learn people’s names and small talk for a while. Chances are you’ll be seeing the same people at the next class, so there’s potential for building a friendship. If you primarily have a home practice, invite a friend over to practice with you and have some tea afterwards.
  • blanket bundle – Starting class seated cross-legged or in Sukasana is the general way I do things. From here I chat with students, give my intention, and bring them into their breath. To have a hygge experience, suggest to students that they wrap a blanket around their shoulders. Dim the lights or have only soft lighting on for an added touch.
  • vinyasa flow – Yin or restorative yoga might come to mind when thinking about a winter yoga class, and they have their own place, but to feel heated and warm from the inside out, it’s important to flow. Warming up and continuing to vinyasa flow will keep your muscles warm and open and allow you to go to your deepest edge in your practice. The body heat of the class will warm the room up and have everyone feeling hygge in no time.

Flow

  • slow it down – During the cool down of your practice light candles or dim the lights. If you like to practice with music, make sure that your playlist includes some mellow, sleepier tunes to put on during cool down and Savasana. Be careful if practicing alone, opt for Christmas lights over a candle if there’s a chance you might accidentally fall asleep.

If in Busan, come to my yoga classes to delight in the experience of hygge yoga! Class information can be found in the events section of the Busan Yoga & Meditation page.

Hosting a Plastic Free Event (and Why I Did It)

This post is about my first experience hosting a plastic free event. I did not do this alone, the organizers of the Busan Veggie Fest were amazingly proactive with my initial idea to go plastic free for their event, and did a lot of work. Initially I thought this would be a simple, short bulleted post  comparable with, but not as bad, as Buzzfeed, but it was impossible. I had to include the reasons why to host a plastic free event, because it’s not just something to do for fun. There is substance and ethics behind it. You have two options as a reader, you can jump to the bullet points and read the How-To’s, or you can read the post in it’s entirety.


Single-use plastic is everywhere. When I comb the beach for litter, I mostly collect cellophane wrappers, candy wrappers from individually wrapped candies, coffee cups (paper and plastic,) water bottles or other beverage containers, and straws.

That plastic that either comes in with the tide or goes back out with it, or is haphazardly dropped by a hand,  will be floating around the ocean for quite some time as it slowly photo-degrades, seeping out chemicals as it does so. An equally depressing result is that it will be consumed by marine life that mistakes the small, broken down plastic for food. If you’re no animal lover and could care less about flounder being discovered with plastic stomachs, then at least consider this – that plastic consumed by fish, will make its way through the food cycle straight onto your plate. Plastic is even being found in table salt. You can do your part by planning Plastic free Event and sharing why you did it.

Generally people planning parties find it more convenient to buy a box of plastic forks, some colorful paper plates, and those ubiquitous red cups for their guests to eat and drink from. I agree, it is easier to toss a box of plastic forks into the cart with ingredients for your food, but is it wise? Those forks might not make it to the recycling bin and instead go straight into the trash where they’ll take hundreds of years to go away. That fork that assisted food from your plate to your mouth for twenty minutes will take hundreds of years to go away. And recycling is nice and green, but it still uses a lot of energy to transport, process, and reproduce when the alternative would be to wash some forks in the sink.

That fork that assisted food from your plate to your mouth for twenty minutes will take hundreds of years to go away.

Ditch the straws and plastic forks and opt instead for what’s in your kitchen drawer. Here are some tips for planning a plastic free event.

  • PROMOTE – As you promote your event let everyone know that no single use plastics will be used, so they must B.Y.O.E., Bring Your Own Everything. Include this information in your invitations if you go old school with paper invites, or write a prominent description in the events page if you use social media.

PlasticFreeEvent

  • EXPLAIN – Although it wasn’t that long ago that plastics were nonexistent, the majority of the population has gotten used to the convenience of using plastic. It might seem odd to some guests to pour holiday punch into a coffee mug that they carted with them as opposed to filling up a red dixie cup, so be sure to let them know why you are making them do so. Once people learn or are reminded of the dangers of plastic pollution in the oceans, they will hopefully jump on board for your party (and carry the habit into their daily lives.)
Above: An informative display on the afterlife of plastic if disposed of improperly. The numbers are the estimated years it takes for such items to decompose. Photos are of a local beach, covered in PLASTIC LITTER FROM A TROPICAL STORM.
  • RECRUIT HELP – Ask like-minded friends to help you get the word out. My first attempt at a plastic free event would not have been possible without the help of the organizers of the Busan Veggie Fest. They let the providers of food know and even provided plates and supplemental utensils.
The amazing hosts of the Busan Veggie Fest did a beyond expected job of making the event plastic free.

The amazing hosts of the Busan Veggie Fest did a beyond expected job of making the event plastic free.

  • CONSIDER OPTIONS – If you have a kitchen with enough utensils, cups, and plates for all of your guests, then of course you would provide everything instead of asking your guests to B.Y.O.E. If you’re hosting a big event and do not have enough to go around, then do both: encourage guests to bring their own, but also bring extras for those that are uninformed or lack the materials.
  • BE KIND – It’s not us vs. them when it comes to environmentalism, it’s educating those who simply are unaware of the extremely negative impacts of single use plastics. Before public awareness and mass drives of knowledge, people used to smoke cigarettes without a care in the world, but once the science came out actions and laws changed. I’m saddened almost daily by the damage that human beings are causing the land, but I try to remain hopeful at the same time. If someone comes to your event with a fresh bottled water in their bag, don’t scorn them or even double take. In order to get your point across to everyone give a small talk about why you chose to make your event plastic free, and/or create an informative display or poster, hopefully inspiring the water bottle holders to go to their local thrift store and look for a tumbler.

Best of luck in all of the planning of your next event. It’s not impossible to host an event plastic free. On a smaller scale, say a family event, it might be what you’re doing already, I hope that this post inspires you to expand that to bigger community events. The Busan Veggie Fest had around 30 guests and not a single plastic utensil or bottle was provided for them.

How have your plastic free events gone?

Yoga Warm Up for Bouldering & Climbing

Bouldering is a challenging activity. It requires openness, strength, and concentration. Bouldering differs from climbing in that no ropes or harnesses are required, and because of that climbers often do more horizontal than vertical courses (uh-hem, especially if they have a fear of heights.) Yoga is a perfect complement to bouldering and climbing as it opens the joints, stretches out the muscles, builds strength, and calms the mind.

Here are some yoga poses to incorporate into your next bouldering or climbing session.

Warm Up Simple Sun Salutations will get those hamstrings and glutes warm. If you’re not familiar with Sun Salutations then do your own little warm up, if you’re ready to get on the wall quickly, then be mindful not to go beyond your limit in these warm up stretches.

SHOULDERS You want to be sure to warm up your shoulders before a shoulder intense activity like bouldering, this is especially true if you have tight or previously injured shoulders (I’m looking at you, dislocators!) While doing Sun Salutes, focus on drawing your shoulder blades down and in towards each other as you raise your hands overhead. Here are more shoulder openers:

  • Down Dog at the Wall With feet hip-distance and a slight bend in your knees, raise your arms overhead and place the palms flat on the wall. As you exhale, sit back like your going to sit into a chair, but don’t go so far that your hands come off the wall – keep contact. Go until your hamstrings say to stop and focus on pulling your shoulder blades down and in towards the middle of the back. Hold and breathe for five breaths or longer before inhaling up.
Downdog at the wall

Downdog at the wall

  • Garudasana/Eagle Arms  Start with the arms, bring them to a T, palms facing down. Exhale and cross the right arm over left. Bend at the elbows and touch either back of the hands or wrap until the palms touch. Hold and breathe deeply, release on an inhale and switch the arm that was on top.

Eagle Arms

  • Gomukasana Arms While standing with feet hip-distance, inhale the right arm next to the right ear, palm facing forwards, exhale and bend at the elbow so that the right palm slides down the back. The left arm stays by the left leg, bend at the left elbow, palm facing back behind you, and as much as you can bring the two hands to touch (use a towel or hold your t-shirt if need be.) Hold and breathe five breaths. Inhale release, and switch sides.

HIPS Often times while bouldering you will take a stance which requires really open inner-hips. The knee and toes will face away from the core as the front body is almost totally flush flat against the wall. The outer hips and glutes help push off from the legs to find the next hold. Warm up with these inner-hip openers:

  • Utthan Pristhasana/Lizard Pose Come to a low lunge with the front foot to the outside of both hands. Point the front foot and knee at a 45 degree angle, bend deep into the back hip, bringing it forward to get a stretch in the psoas. Hug the front knee in towards the front shoulder to get into the inner hip.To make the pose more intense, lower down onto your forearms, bent at the elbows. Hold for a few breaths and switch sides. To make the pose more intense, lower down onto your forearms, bent at the elbows.

Lizard

  • Utkata Konasna/Goddess Pose Stand with feet wider than hip-distance, knees and toes point out at a slight angle. Bend at the knees until you feel a good burn in your quads or glutes. Keep your torso upright, shoulders over hips, hold and breathe. Straighten knees and rest. Then go into again and place the hands on the top of the thighs. On an exhale, push into your right thigh with your right hand as you gently gaze over your left shoulder. Switch sides after holding five breaths. 

Goddess Pose

  • Malasana/Deep Squat Stay with your feet pointing out and knees following in the same direction just as you just did in goddess pose. Bend at the knees and allow your hips to sink towards the floor. If this isn’t possible for you, then lower only as low as is possible (meaning your bum might be in the air a bit.) Place your elbows inside your knees and press into them to open up the inner-hips. Palms come to prayer. Be aware of your spine and try to keep it erect as opposed to rounding. Stay and hold, straighten the legs to release.

Malasana

  • Kapotasona/Pigeon Prep Bring your right knee to your right wrist, right foot to left wrist. Left leg shoots straight back behind you on the floor. Stay upright with weight in your hands, or forward fold, being sure there is no pain in the right knee. Switch sides.

Pigeon

TOES Climbing shoes are small and sometimes pinch the toes together to enable more control in standing and pushing off of placements or juts of rock. Crimping toes together is very anti-yoga and doesn’t feel nice, so as soon as you pull your feet out of your climbing shoes I suggest giving the toes a big stretch. You can reach down and do this manually, sticking one of your fingers in between each toe and giving it a wiggle, or if you have the bodily awareness and control, you can simply find yogi toes.

Yogi Toes

Enjoy your climbing or boulder session with openness and awareness!

DIY Your Halloween Costume

Halloween’s coming up which means that stores are full of racks of cheap, synthetic costumes (possibly to be worn only once and then disposed of the day after the party.) Holidays have become so commercialized, being more about what can be sold than about the holiday itself. Consumerism creates a lot of waste, not only the costumes & decorations themselves but also all of the plastic packaging that they come in. So this year, consider doing a DIY costume: they’re cheaper, more ethical, friendlier to the earth, and are an outlet for creativity.

Don’t get me wrong, I love Halloween and have dressed up every single year. It’s fun to put on a costume and be someone else for a night, but sadly costumes are generally made of petroleum-based fabrics (think nylon, polyester, and acrylic) because they’re cheaper than natural fibers. After the parties they’re typically just tossed out in the trash, making their ways into landfills (being too poorly made to be handed down – simple stitching on those short-lived fabrics means they’re likely to fall apart before making it to a thrift store.)

Here are some tips for making a DIY Halloween costume.

  • Start early, finding the right things will take longer than just popping into a box store and pulling something off of the shelf. If you’re reading this on the day of your party, don’t panic, think outside of the box and you’re sure to pull something together (stuffing socks into black panty hose and pinning to a black skirt with eyeliner whiskers is an instant and easy cat!)
  • Scope your closet. All you need is one item to begin the creative process. Once you have a defining piece, try to match something else you have with it to build upon the look. If you can’t find it in your own closet then look in your friends’ and family members’; for example overalls and your boyfriends flannel morph into a farmer or scarecrow.diyhalloween
  • If all closets leave you empty handed, or you don’t want to risk staining your clothes with fake blood, then head to the thrift store.  Don’t feel stuck with the way the clothes are, cut them up or alter them if you have the skills.
  • When in doubt, Google search! You’ll find loads of images that you can get inspiration from and might even find a blog or Youtube tutorial to follow.
  • Turn your clothes into a costume by adding face paint or accessories.  Again, seek resources online.Screen shot 2015-10-18 at 6.39.43 PM

Here’s a little gallery of previous DIY costumes friends and I have done.

Have fun with Halloween and be safe! What successful DIY costumes have you come up with and how are you decreasing your impact on our Earth this Halloween?