Day Retreat – BK Meditation Center – Tagaytay, Philippines

Over the Lunar New Year holidays, I was fortunate enough to be able to take a short three-day-trip to the Philippines to warm up one last time before leaving cold, wintry Korea. Three days is not much time in the mass array of islands that is the Philippines so my friend and I did some research and decided to visit a lake district just south of Manila to cut travel time. Just a simple two hour bus ride and we were out of bustling Manila and in the diversely green hillsides of Tagaytay.

In a quick Google serach of yoga in Tagaytay, I discovered that there is a Brahma Kumaris center there, and fortunately for me they were hosting a day retreat on the day of my arrival. It was perfect. I sent my email registration and soon received an acceptance email that outlined the theme of the retreat –  Heal the Heart and Feel “The Circles of Love,” so themed because of the Valentine’s holiday coming around the corner. As Amy wrote before, residents at BK centers refer to themselves and others as Brother & Sister; in my acceptance email, Sister Tim Tim answered my inquiries about the retreat like this: “The facilitation of this event is free as our service to humanity. However, for your snacks, lunch and use of the facilities, there is a contribution of 500pesos per person. You can bring your own notebook and pen with you should you wish to take notes.”

“The facilitation of this event is free as our service to humanity.”

– Sister TimTim, BK Meditation Center, Tagaytay

Getting There

How to get there from the Tagaytay bus terminal, which is more of a gathering of trikes waiting to take customers to destinations, buses don’t actually stop and park at the terminal, but instead stop on the side of the road so passengers can disembark; be sure to tell the bus driver in Manila that you’re going to Tagaytay and he’ll know when to have you get off.

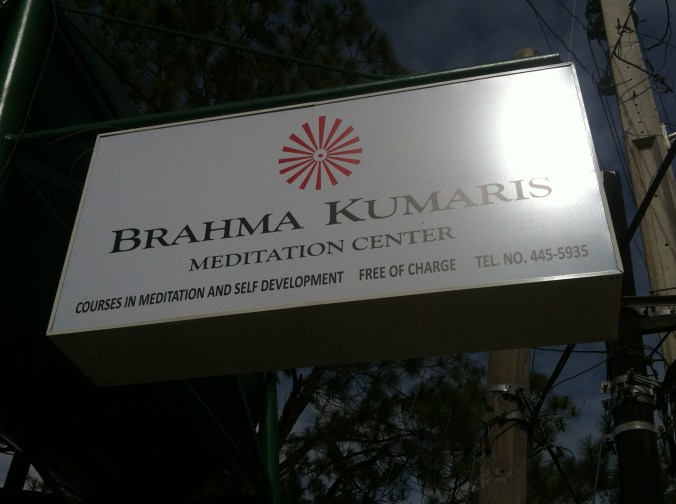
Once you get off the bus, grab a trike and tell him to take you to Magallenes Drive. He’ll know the name of the road but may not be familiar with the center, so keep an eye out for it. It’s a white building on the right-hand side of the road, with a blue Brahma Kumaris sign hanging from a light post. It will take a few minutes of driving on Magallenes Drive to get there. From the bus terminal it should cost about 150 PHP for transport by trike.

The Center

The center is beautiful. The atmosphere is peaceful from the very second that you enter the blue-lit entrance-way after ringing the doorbell. Visit the front desk and inform them of your visit. If you’ve registered online beforehand then that’s great, they’ll have your information, but if you didn’t, or bring a friend who hadn’t registered then ask if there is still space and more likely than not they’ll say yes to having added participants.

My friend and I toured the area after registering and were joyously surprised by the beauty of the center. They took care to display an array of thriving local fauna in the garden and even in the indoor areas. The center facilitates a dining area, a large hall where our retreat was held, a meditation hall, the main lobby with toilets, and even has a residential area for participants and guests to stay overnight. A Sister asked upon our arrival if we had a hotel booked already, which we did, but I imagine that via email you could inquire about the cost of overnight stay.

The Event

The Day Retreat was from 9am-4pm. Before it started we had some coffee in the dining area, then everyone grouped in the main hall to start the day’s activities. For the first few hours we were divided into random groups in which we discussed topics about love – it was a good opportunity to get to know some local Filipinos.

In the afternoon there was a guest speaker who took over for the rest of the event. She was Timmy Cruz, a TV star turned singer, who entertained us with songs aplenty. At times the event felt a little on the long side, due to travel (an overnight flight with only little sleep on the concrete airport floor,) but the vibe of the event was warm and inviting, and the people’s warm energy (and multiple cups of coffee) got me through the seven hour schedule.

The Food

Go for the food, stay for the meditation – it was good. Another energy booster was the frequent breaks for food. In the morning we had a heaping pile of vegetarian pancit (pictured below,) a Filipino staple, and banana for a snack; lunch was veggies, rice, a soy-meat in sauce, and desert of pandan flavored jelly; afternoon snack was a sweet cassava cake (pictured below.) All food at the center is vegetarian and delicious. What a great deal, especially for this budget traveler, to pay the event fee of 500 PHP (roughly $10 USD), get atmosphere, learning, amazing food, and good company.

The People

Meeting local Filipinos was the best part of the event. Previously, the primary interactions that I had had on my past two visits to the Philippines were with service industry workers, who were very friendly, but I didn’t really get to know any locals. Having conversations together during the workshop event and casual chats over coffee was nice and enjoyable, especially after so much time spent in Korea where the language barrier doesn’t allow for conversation with locals as easily.

There was a mix of people who were attending their first BK event like I was, and there were some people who frequented the center often. Of the people who were attending for the first time, many said that they would like to return, and I think I’d put myself in that category, too.


Brahma Kumaris is a meditation center that hosts meditation classes, retreats, and seminars and has locations dotted around the Philippines and the rest of the globe. If you get the chance to visit the Tagaytay BK center, take it. The experience was nothing short of delightful: beautiful, natural surroundings; delicious food; and warm-hearted people.

20160207_160223.jpg

Yoga Barn, Ubud – Review

It was early January, and I had just come from a month in the Philippines with a pretty poor record of practicing yoga. Once I arrived in Ubud, a gorgeous jungle yogi paradise set on the Indonesian island of Bali, I bought a card at Yoga Barn and got excited.

photo 2

Yoga Barn is the perfect place for the yoga-curious. Its teachers offer beginners classes as well as classes and workshops for more advanced students who want to deepen their practice. The schedule is packed with 11-15 classes a day, each of them different, and when I was there in January, 16 different styles of yoga were on the schedule.

Months ago, when Ubud was just a daydream I’d pieced together from Instagram images, one of my friends told me that her time there shook everything up – in a good way. I didn’t quite follow, but I loved that she said it, and I’ll admit that I wanted to experience some of whatever it was that shook her. So, in the two weeks I spent in Ubud, I went to seven classes at Yoga Barn: restorative, laya, vinyasa, acro (twice), kirtan, and nidra. I dug right in with a sense of experimentation and wonder.

The classes

After an airport nap, over-night flight, and early morning transport from Denpasar to Ubud, my boyfriend and I sought a little therapy and relaxation with Yoga Barn’s evening restorative yoga class. It was held in the upstairs studio, an elevated hut that comes with everything one would need for the practice: mats, bolsters, blocks, straps, blankets, water, and all-natural mosquito repellant. We left the class feeling incredibly relaxed. As we noshed on sushi rolls at an open-air Japanese restaurant across the street afterward, we fell totally in love with Ubud.

Our first yoga experimental class was Sunday morning laya yoga, recommended by a friend who told us to go into it free of expectations or assumptions. The three-hour class was based in kundalini and incorporated a lot of up and down movement with coordinated breath. Much of the class focused on vocal expression, releasing built-up tension, and letting sounds involuntarily move through us. As a student laughed hysterically on the other side of the room and others orgasmically moaned through poses, the teacher noted that if any of us were annoyed by the sounds of others, it was a good thing; that means it’s working. Accept it and move past it.

photo 1
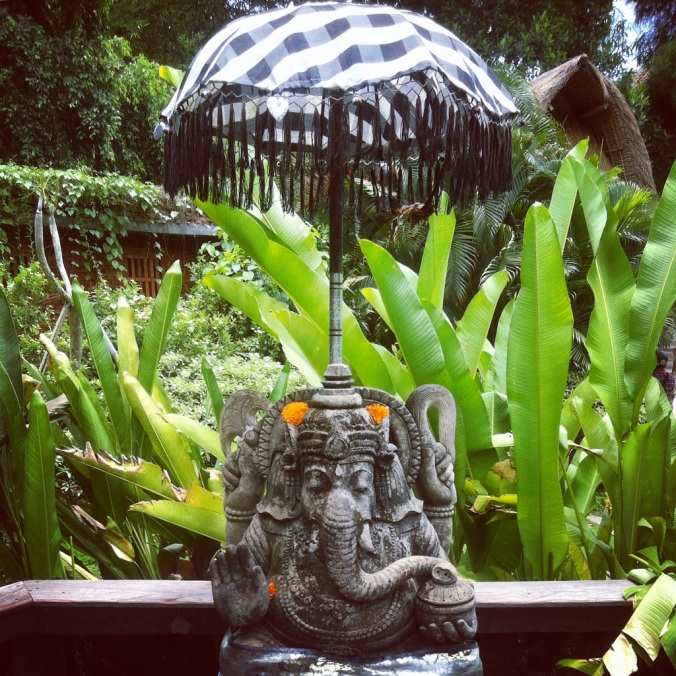
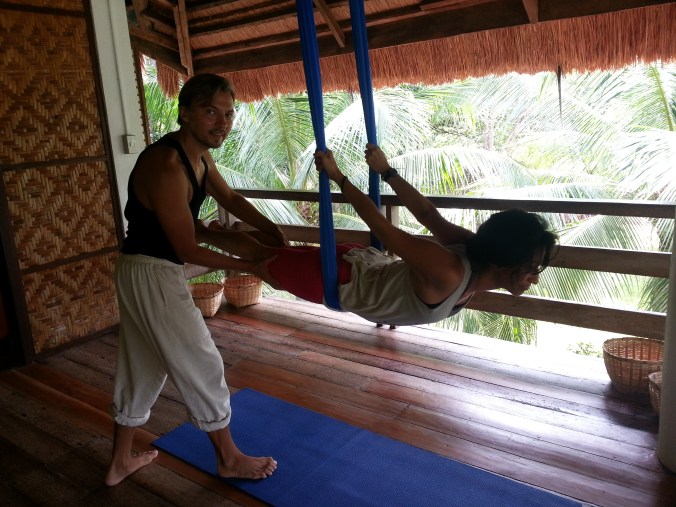
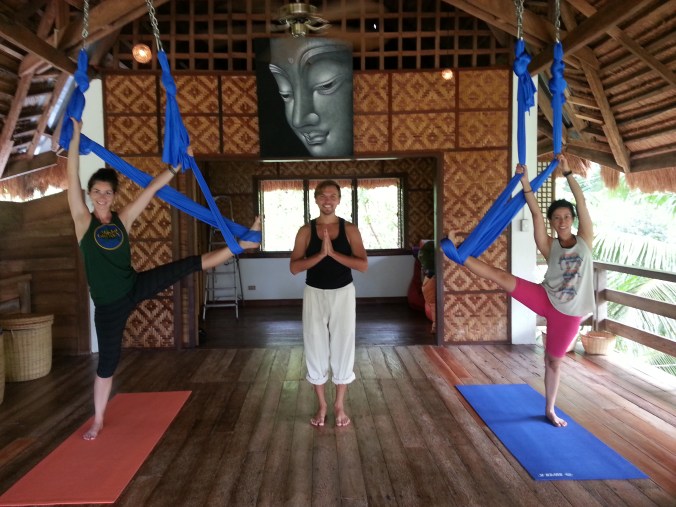
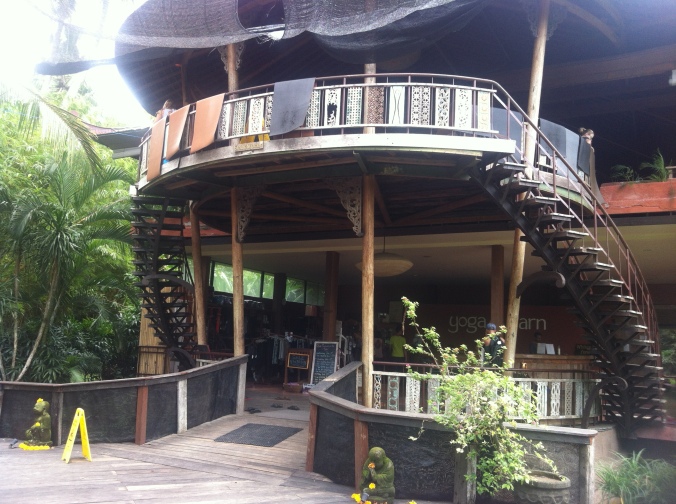
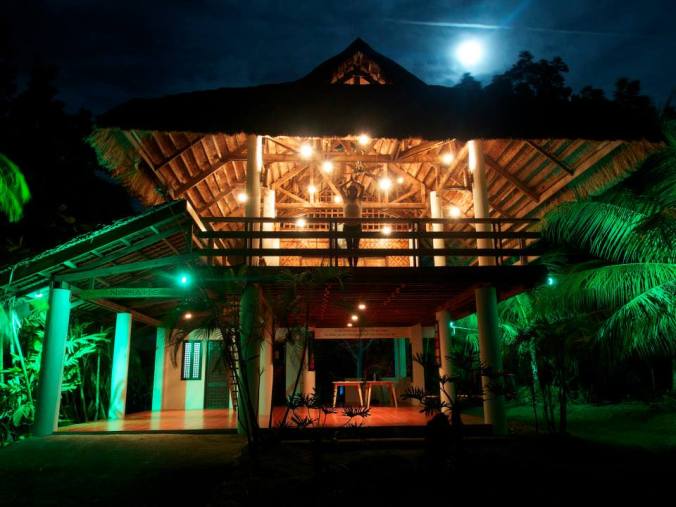
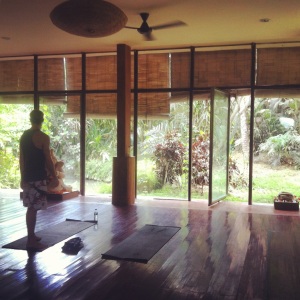
Feeling the need to get back to basics the next day, we signed up for a good ol’ vinyasa class. The flow incorporated a 15-minute inversion practice break, which was fun for about half of the class and confusing for the rest. On a whole, though, it was just what we came for – an energetic sweat session in the afternoon Balinese heat.


My next two classes were acroyoga, and I was surprised by how unique each class was. We didn’t do a single warmup or pose in the second class that we did in the first, and it was almost a completely new group of people. While both classes focused on the acrobatics component of acroyoga, the first one was much more playful. We warmed up by doing a tougher version of wheel barrel – this time with feet hooked on hips and no hands from the partner walking upright. We stacked plank on plank and did synchronized pushups. We got into teams of three for assisted handstands. The second class taught me several new poses, which was exciting and inspiring. After a much shorter warmup, we practiced flag, flying child’s pose, and moving from a easy throne to shin stand.

After the second class, my boyfriend met back up for an acro jam on the patio just outside the studio. We met a few others from the class, as well as seasoned acro yogis, to practice and play.

photo 2

The following Sunday night took me back to The Barn for kirtan, another friend recommendation. Sitting in a semicircle facing three musicians, we closed our eyes and chanted together in Sanskrit, sharing the energy and power of a group sing-along and slowing down the tempo as the class came to a close. The 15-minute savasana at the end put me into the most relaxed state I’d experienced in quite a while, and I walked out peaceful and totally happy.

My second time in Ubud, I returned for a yoga nidra class. Again, it came as a recommendation – this time from my boyfriend’s mom, who had become familiar with it during her yoga teacher training in the states. I heard how relaxing people find it and went into the midday class half expecting to take a nap. Instead, we were instructed to walk the line of total body and mind relaxation without completely succumbing to sleep. With the teacher as a guide, the intention is to do a full body scan and focus on one body part at a time. The teacher then moved onto describing a place and telling a story while we were instructed to visualize the imagery using our subconscious minds. Towards the end, I found it difficult to get out of the discomfort in my physical body (cold, laying on the floor) and get into a state of relaxation. But I don’t think I fell asleep, so at least there’s that.

photo 1

Even though I may have decided some of these forms of yoga aren’t for me, it’s hard to say anything bad about my time practicing at Yoga Barn. Each class opened my eyes to new people and practices, taught me something about myself, and gave me something to work on – mentally or physically.

Facilities

First, the restaurant: It’s really good. It’s reasonably priced (about $3-$4.50 per dish) and offers everything from pre-yoga energizing drinks and cashew nut lattes to Ayurvedic kitcheree and macrobiotic main dishes. And it’s super tasty.

A juice bar – which sells drinks, popsicles, and quick treats for before or after class – is also just outside the studios.

The upper studio holds 35 people, and the lower studio holds 30. FYI, they do strictly hold to that number and turn people away once a class is full.

Showers (with liquid body soap) are available to use post-class, free of charge. There’s also a water cooler near both studios.

Pricing

Individual classes are about $9.50, but cards are the way to go if you’re planning to attend at least three. My boyfriend and I each bought the five-class card for $37. If you’re in town for a long stay and want to try it all, you can purchase a 30-day unlimited card for around $190.

Directions

Yoga Barn, located at the end of a small alley in Ubud, is in walking distance from tons of hostels and guesthouses. If you’re heading south from the palace on Hanoman, the alley will be on your left. The sign, which is found at the top of a list of other destinations down the same alley, is a little difficult to spot from the main road, so also keep an eye out for Zen, and turn there.

photo 5

Yoga Barn hosts movies, yoga teacher trainings, workshops, and retreats.  Check out www.theyogabarn.com for schedules, current prices, and directions.


Yoga Barn Panglao – Guest Teaching Volunteer Program – An Interview with Barbara & Steve

My most recent post was about my experience guest teaching at the Yoga Barn Panglao, which is located on the utopian island of Panglao, Philippines. I am so impressed with the way that the guest teaching program is run that I decided to ask a few questions of the barn to get a better understanding.

I am a teacher who daydreams about teaching in paradises all over the world and might even want to run my own studio one day, so I was curious to learn more about their guest teaching program. Barbara and Steve warmly replied to my questions, so for your benefit and mine, I provide their answers below regarding their unique volunteer program.

10904530_720728348025720_899485961864692438_o

Barbara & Steve of the Yoga Barn Panglao


KBY (Kara Bemis Yoga): Where did the idea originate to freely host guest teachers?

YBP (Yoga Barn Panglao): One of my teachers taught me about the importance of non-attachment. When it comes to asanas we all have our preference for a style or particular teacher. For the good and growth of my regular students I love to give them the chance to practice with different teaching styles.

It’s also great to see teachers used to working in big city studios getting inspired all over again by the beauty and magic of the Barn itself. There are two types of non-resident teacher programs at the Barn.

The Guest Volunteer is for experienced teachers who are here for a short time and just want to share their skills and passion for a class or two.

The Intern Volunteer is a program aimed at freshly certified teachers who feel they need more practice or are a little shy about leading class or perhaps they just need some experience for their CV [resume]. For them we offer coaching, support and guidance and the chance to use a great space. For the new teachers as well as us here at the Barn it’s all about sharing, deepening our knowledge and teachings skills.

KBY: How does it benefit the barn, the community, and the two of you as managers?

YBP: These kind of programs take a lot of commitment from Steve and I [Barbara], but we really love to see our local community growing and getting a wider understanding of what Yoga really is about, and for us, we improve the business with the help of the volunteers, plus we get to meet some awesome people!

KBY: Who qualifies to guest teach?

YBP: Anyone who is an experienced Yoga or Meditation teacher, dedicated, passionate and wants to share can volunteer as a Guest Teacher. The volunteer intern [program] is open to those who have just finished their YTT or those who have been out of teaching for a while.

KBY: What is expected of a guest teacher and what is the general exchange for them?

YBP: From my own experience as a traveling yoga teacher, I learned that a flexible mind is more useful than a flexible body when it comes to teaching students of different levels, nationalities and attitudes! Guest teachers learn from the experience of serving, teaching and sharing and they get to do all of this surrounded by nature on a beautiful tropical island.

KBY: What’s the best way for an interested, certified yoga teacher to contact you and what sort of information should they provide?

YBP: Contact us before hand; we will want to know about you, about your experience, what you hope to gain from your time with us and how we can help each other.

Contact: info@yogabarn-panglao.com


If you are a certified yoga teacher who would like to keep your skills sharp while traveling, maybe looking to travel on a budget, and are willing to exchange your teachings for yoga classes, then guest teaching is perfect for you. Whatever your reason, you’re sure to leave with a new anecdote to tell your friends and family about that time that you taught yoga in the middle of a Filipino forest.

10917873_725220937576461_6562299261288758102_n

Pure magic

Yoga Barn Panglao – Guest Teaching Experience

It has been a goal of mine to teach internationally after leaving my longterm home of South Korea. This idea of mine is nothing serious, I don’t expect to become a big name teacher, nor do I want to, but I do have a desire to use networks of teachers and social media to find teaching jobs here and there while I travel. I want to do this to keep my skills sharp and to experience different kinds of studios, and meet new students.

But where to start? It’s a daunting task to reach out to strangers and ask if you can teach for them. Who am I to them? I often think that I’m just a small fish in a little pond, but I’m now preparing to swim upstream and test bigger waters.

Of course you start with google searches, which is what I did before my recent trip to the Philippines, and I was happily surprised to stumble upon Yoga Barn Panglao, a picturesque studio set in nature on the island of Panglao, Philippines. It’s not uncommon to find yoga studios on tropical islands, but what is really unique is to find a studio with managers that openly accept guest teachers, and that’s just what I found at the barn.

Through my google search I discovered a tab on their website entitled Volunteering. I clicked on the page to find an outline of the opportunity they have for guest teachers to share their teachings in exchange for classes. This was exactly what I was looking for!  What was exceptionally perfect for me was the final description that read: No minimum volunteering time is necessary, key to my 10 day visit over the holidays.

Teaching

Teaching back “home” in Busan.

Emails were exchanged with the kind Barbara of the Yoga Barn Panglao and she instructed me to speak in person with their interim teacher who was holding down the fort for a month while Barabara and her partner, Steve, returned home for the holidays. Once I arrived on the beautiful island of Panglao, I attended the first class I could and met their substitute teacher, Emilie, my resume in hand, and we worked out a  teaching slot for me. It was perfect. I was instructed on how to manage things for my Wednesday sunset class: where to turn on the lights and fans, where the props were kept, and as for signing in students, Emilie met me there and took care of that.

The class itself was great. I was able to experience teaching a set of entirely new students and took on the responsibility of making them comfortable, confident, and safe. The second story platform studio is well equipped with mats and props, and I was even thoughtfully left with natural insect repellent for myself and students. And don’t forget that location! It was a dream come true to be able to lead a class in such a serene  setting surrounded by the sounds of crickets and shimmering, shining stars.

20151229_095633.jpg

Yoga Barn Panglao

The prior correspondence with Barbara was an experience in and of itself, as I felt the waters out of the bigger yoga world, polished my resume, and shifted into a warm, yet professional exchange. Barbara did a great job of melting away any and all of that business-like coldness and we were able to communicate openly and comfortably via email before my visit to the island.

If you get the special opportunity to visit Panglao as a yoga teacher, I highly suggest that you contact the kind people of the Yoga Barn Panglao and start a conversation about guest teaching. They’re warm, friendly, open and professional. And for you as a teacher you will get the rare opportunity to teach in the paradise of Panglao, growing your resume all the while.


Yoga Barn Panglao, How to Get There:

You could walk from Alona beach, but it will take at least 30 minutes or more. A cheaper and more comfortable option is to take a habul-habul, or motorbike taxi there. The first time I took a habul-habul the driver didn’t know where the barn was, so make sure t0 screenshot the image of the map on their facebook page to show the driver, or have them ask a local how to get there. It should cost about 25PHP from Alona beach.

Address: Bolod, Poroc 3, 6340 Panglao Island, Bohol, The Philippines


Yoga for Diving & Snorkeling

20151223_132208.jpg
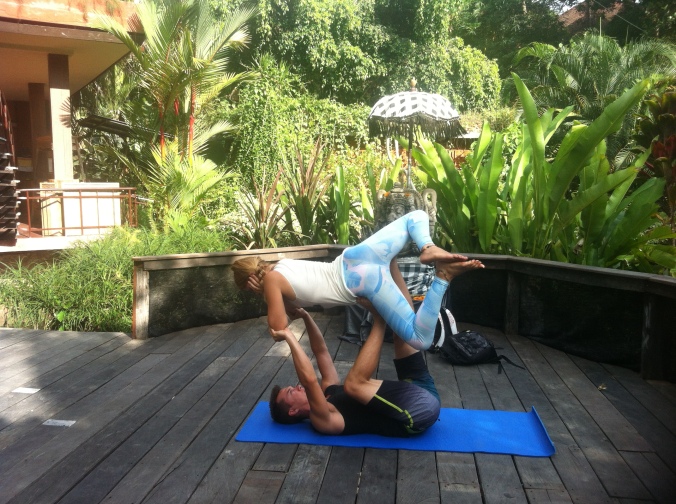
It is a beautiful thing to have the opportunity to delve into the seas and oceans to view and be with the fish, coral, and other beings that live below. On my recent trip to Panglao, a small island off of Bohol which is part of the thousands of islands that make up the Philippines, I packed my fins in my bag and got in the water to see some amazing sights. Blog post on those specific experiences in the future, but for now here are my pre-snorkel/pre-dive yoga tips.


Isolate

Because it’s all about those hips, bout those hips… and ankles. Focusing on twisting from side to side at your torso and hips will greatly improve your propulsion through the water with fins on. Here are some yoga asanas that will get your body twisted.

Torso Twists

  • Sukhasana/Easy Seat Twist: Sit cross legged. Feel grounded through the sit bones, tall all the way up the spine and through the crown of the head, knees fall out to the side. Bring awareness to the breath for 30 second, making it long and calm. Then on an exhalation cross your left hand to your right knee and place your right fingertips back behind you. Stay and hold for 5 breaths. Inhale back to center and exhale to the left side. Hold 5 breaths. Continue for 3 rounds.

20160121_182009.jpg

  • Anjaneyasana/Low/High Lunge Twist: From Downdog come into a low lunge, right foot forward, right knee directly over ankle. Lower your left knee to the mat, toes tucked. Bring your arms to your heart in prayer position. Inhale, lift your left elbow high to the sky, exhale and cross the left elbow to the right knee. Try not to crunch the left ribs, but instead create space there. Use the left elbow against the right knee for resistance and extension. Option to lift the left knee off the mat and extend the leg straight. Hold for 5 breaths. Switch sides.

20160121_182214.jpg

  • Dynamic Standing Twist: Stand with feet hip distance and a slight bend in both knees. Let your arms hang limp by your side, shoulders down your back. Inhale and twist left, swinging the arms with you so that the right arm gently hits the area of the left kidney. Inhale and twist to the right, this time the left arm hits the right back body in the space between the hip and ribs. Continue moving left and right while swinging the arms and gently hitting the back. Keep the bend in the knees the entire time. Focus on the twist coming from the abdominal area. This is the part of your body that you will mostly use when snorkeling. The fins makes it easy to move yourself through the water primarily from the torso twist, and when you have it down well you won’t even need to use the arms, freeing them up for your go-pro!

20160121_182024.jpg

Open Ankles

  • Adho Mukha Svanasana/Downdog Variation: Come in to Downdog, feet hip distance. Lift the right foot slightly off the floor, point the toes and cross the foot over the body to place the top of the toes (your toenails) to the left of your left foot. Breathe energy into the top foot and ankle area, where your shoe laces are. Switch sides after 5-10 breaths.

20160121_181949.jpg

  • Ardha Hanumanasana/Half Split Variation: Kneel on your knees and swing your right foot out front, don’t let the right hip change position when you do this, make sure that it stays in line with the left hip. Flex the right heel and lower the hands to blocks or the floor. Breathe to stretch the back of the leg. After 3 breaths, extend the right toes to the floor, hold and breathe for 5 breaths. Repeat on the left side. Opening the top of the foot, front ankle area will increase the effectiveness of your fin use while snorkeling or diving.

20160121_182111.jpg

Breathwork to Calm the Mind

  • Slow it Down: I often instruct students to lengthen their breath at the very beginning of class and to attempt to keep their breath at the long and steady pace during the entire class, no matter how challenging the poses become. The same technique can improve your diving & snorkeling, because although it’s a beautiful and tranquil world down there, feelings of stress and anxiety can arise by putting yourself in a whole new environment.
    • Slow Breath: Before getting in the water sit, or stand and breathe as slowly as you can. Begin breathing just through the nose like you do for yoga.
    • Diving/Snorkeling Breath: While diving & snorkeling you will breathe only through your mouthpiece for an extended length of time and venturing into the unknown vastness of the deep deep ocean can sometimes cause panic. Practice lengthening the breath, and especially lengthen the exhalation. Make the exhalation longer than the inhalation which lowers the heart rate, calming you down. Do this only through the mouth only for a few breaths to stimulate the mouthpiece, or do it right when you enter the water with the mouthpiece already on. When diving, use the deep breath only as a calming technique and ask your instructor for the appropriate breaths to be taking during the dive as you don’t want to suck up your tank too quickly!

20151227_111750.jpg

Have a great time exploring the surface and depths of the beauty below. For tips on how to keep coral safe while snorkeling, read this blog post about eco-packing which includes tips for the harsh sun and against harsh sunscreens that can cause coral bleaching.


Intro to Raja Yoga – BK Meditation Center – Luzon, Philippines

I found the Brahma Kumaris Meditation Center in early December of last year. I was in the middle of a solo trip around Luzon, the biggest island in the Philippines, and after a week or so of hiking volcanos and wandering museums, I felt the need to stay put in the city of Baguio for a couple days, dig a little deeper, and figure out my next steps.

The Baguio center had a five-star review on TripAdvisor, but with only three reviewers, I wasn’t totally sure what to expect on my visit, other than the peaceful experience and beautiful views that had been written about. I liked going into it this way, without knowing too much.

photo 2

The grounds of Baguio’s Brahma Kumaris Meditation Center

Before my visit, I wasn’t sure what kind of vibe the center would have or even what kind of meditation classes were offered, but I was crossing my fingers that I’d at least meet people there who could point me in the direction of some Baguio yoga classes.

Up until then, I’d assumed anything called “yoga” had to do with the joining of movement and breath. The Brahma Kumaris Center was my first encounter with a different kind of practice – the practice of raja yoga.

I showed up on a Sunday afternoon, at the end of a weekend gathering of Filipino Brahma Kumaris practitioners. The Baguio center is a gorgeous, small green space with one of the best views of the city, near the top of a hill overlooking valleys, homes, and farms.

I was warmly welcomed there by everyone I met. When it became clear that I wasn’t going to find the kind of yoga I was looking for, I scheduled a Brahma Kumaris introductory class with Sister Salud, a self-described “content spirit,” for early the following Wednesday morning.

Lesson 1

The first lesson offered a detailed background of Brahma Kumaris, or BK, a worldwide learning community that practices raja yoga meditation. Literally translated, raja means king, ruler, or highest. Yoga is a union, link, or connection. Raja yoga was described to me as making a connection to a higher power.

Some takeaways from the first class:

  • Practice self-love. We should try to achieve self-love through understanding and appreciation of the self and by doing the best we can to make ourselves happy.
  • Create a link to our inner selves, and work to maintain the following:
    • self-respect – knowing that we are intrinsically good
    • self-esteem – valuing our own uniqueness
    • self-confidence – contributing to the betterment of the world by bringing benefit to ourselves and others
    • self-sovereignty – ruling our kingdoms by being independent and making our lives and ourselves worthy.
  • Meditation is a tool. Use it to discover the self – to contemplate, reflect, and focus on one thing. Still the mind, and actively create a thought to focus on.
  • Take what we want. Relegate old knowledge to the side, and go into new knowledge. There’s a lot to discover. Come to our own realizations and find our own truth. Once we find the truth, experience it and take what’s beneficial.
  • Feed the mind with goodness. Focus on positivity and healing during meditation. Take the dirty, muddy water of our negative selves and run clear, pure water over it until it’s clean.

We ended with a guided meditation, which was the raja yoga practice, and set a time to meet for the next session.

Lesson 2

The second class focused on the soul-body connection and discovering who we are spiritually. Sister Salud said the commonality of every human being is the soul – a living energy of light – within the body. We discussed the location of the soul, what some might call the third eye.

Some takeaways from the second class:

  • The soul gives life to the whole body. The soul is like the driver of the body, which is the vehicle. The body is for expression and experience.
  • Be soul-conscious. We should find a direction and a purpose for what we’re doing. Put the energy of our soul there and focus on the qualities of the soul. This is our energy. It’s intrinsic.
  • Seek peace from within. If we’re aware of our soul energy, we can get support from within. Choose peace, and direct our minds to be peaceful.
  • Drive energy into positive qualities. Remain aware of the type of soul we want to be, and manifest it.

So, how do we manifest a positive living energy of light? According to Sister Salud, that’s the question to be answered through raja yoga.

Again, we ended the class with a guided meditation. My time in Baguio was coming to a close, so she pointed me in the direction of other BK centers along my travel route. While I haven’t taken the time to attend a third session, I’m so thankful for my experience learning about the practice of raja yoga, and I’ve started to incorporate some of the ideas into my meditation practice.

Directions by cab:

Tell the driver to go to Dominican Hill. Once you get a bit out of the city and start heading up the hill, you’ll pass Lourdes Grotto. Keep going up the hill but not quite to the top. You’ll see the sign for the Brahma Kumaris Meditation Center on the right, as you approach the top.

photo 3

It may be difficult to catch a cab back, but start walking down the hill, and you’ll probably get lucky with a cab, tricycle, or jeepney around the bottom of the stairs at Lourdes Grotto.

Brahma Kumaris has over 8,000 centers across 130 countries, and it’s been around for 78 years. Its brochure explains: “Through meditation, we seek to help people rediscover their goodness and develop their spiritual awareness, attitude, and behavior.” For more information, visit BK on the web at www.brahmakumaris.org.

My Flying Yoga Experience

Flying yoga (also known as anti-gravity yoga/aerial yoga) is a trendy style of yoga that until recently I had never attempted. Luckily though, while on vacation in the Philippines, I learned of a class happening at the Yoga Barn Panglao and excitedly signed up.

Fellow karabemisyoga blogger, Amy Steele, came along for the class and it ended up being just the two of us in the morning Flying Yoga class that as of then was not yet added to their regular class schedule. Our teacher that morning was Alex Kuznetsov from Russia. Alex was patient and attentive as a teacher and demoed the entire class so that we could follow along. He then adjusted if needed.

20151229_112859.jpg

Teacher Alex stopping my falling angel from falling so much!

Here are my observations of my first flying yoga class:

  • It’s difficult – I went into the class not really knowing what to expect, but the second we started using the hammock for our warm up sun salutes I felt the burn. Having an extremity, or limb, lifted off of the ground means using your core to balance and keep from falling over. The hammock also offered some resistance that doesn’t usually come with basic standing poses. I found that my muscles were shaking like jelly in poses that are usually very comfortable for me, like Virabhadrasana 2.
  • It’s a prop – The hammock used in flying yoga is essentially a prop that switches up your regular yoga practice. At times the pressure of the hammock felt uncomfrtable against skin and bone, but Alex reassured us that that feeling was normal and would begin to fade away with more practice. I noticed as well that the hammock applied extra pressure that sometimes felt beneficial, such as in Vrksasana. I felt a strong pressure on the sole of my standing foot that felt similar to reflexology.
20151229_112830.jpg

(Uprooted) Vrksasana

  • It encourages engagement – The core is engaged for balance and deeper, more intrinsic muscles tighten up while pulling the legs together to stay upright. For example, in high lunge where the front knee is bent over the hammock, engaging my muscles a lot was necessary so that I could keep the form.
  • It’s beautiful – Although I struggled to get into certain poses, once in them, I did truly feel like I was “flying.” Doing Badha Konasana, or any other pose, while floating two feet above the ground is invigorating. Of course there are plenty of opportunities to snap some instagram worthy pics.
20151229_113035.jpg

Amy and Teacher Alex in Badha Konasana.

  • Relax in that hammock – It’s called a hammock because it’s a hammock, and we all know that hammocks beckon us over to have a doze. At the end of our class Alex guided us in relaxing, longer-held poses. The heat of the island and the sounds of nature could have easily lulled me to sleep in my big blue hammock, but I refrained from slumber.
20151229_113141.jpg

Seated variation of Badha Konasana with tropical palm tree view.


Flying yoga is a fun supplement to a regular yoga practice. There are many benefits to this style of yoga and at the very least it will reinvigorate standard poses that may have lost their luster from years of practice.


Go to Yoga Barn Panglao’s website or their Facebook page to keep your eyes out for future Flying Yoga classes with Alex Kuznetsov.

20151229_113545.jpg

2015 in review, report by wordpress

The WordPress.com stats helper monkeys prepared a 2015 annual report for this humble little blog.

It’s been just over a year that I’ve been sharing my thoughts, ideas,  and inspirations. Thank you to everyone who clicked and read.

I’m very much looking forward to continue sharing in 2016!

Here’s an excerpt from karabemisyoga’s 2015 report:

A New York City subway train holds 1,200 people. This blog was viewed about 3,900 times in 2015. If it were a NYC subway train, it would take about 3 trips to carry that many people.

Click here to see the complete report.

Top 4 Yoga Study Tips

So much more than being a yoga teacher, I am a yoga student. There is so much to learn about yoga, and you don’t have to be a yoga teacher to delve in. There are thousands of years of yogic history, philosophy and knowledge that cannot all be learned in any YTTC.

As a teacher, I strive to learn more and more about the human body and it’s movements and interweaving, working systems. This means studying human anatomy. Muscles, bones, and the like.

On top of the physical aspect of yoga there is a whole new language to learn – Sanskrit.

The list could go on, so to aid your study of yoga, here are four of my top yoga resources that I use to increase my understanding of yoga.

  • TIP ONE – ANATOMY COLORING BOOK – My trainer, Kimberly Waugh of Radiant Life Yoga School, had recommended that I get a coloring anatomy book during my YTTC exit interview back in 2013 when I asked her for advice on how to self-study anatomy. I don’t know why I didn’t take her advice right away, instead I only just recently purchased my coloring book and instantly fell in love. It’s stress reducing and educational at the same time! Grab your own and get to coloring… just one tip – get the big box of coloring pencils, minimum 24 pack.
img_20151007_190442.jpg

Netter’s Anatomy Coloring Book, 2nd Ed

  • TIP TWO – LEARN THROUGH YOUR EARS – I. Love. Podcasts. Many of my conversations begin like this, “I was listening to this podcast about (fill in the blank) and …” I subscribe to an array of them and am open to expanding my list. My favorite all time yoga podcast though is Yoga Body – The Yoga Talk Show by Lucas Rockwood. Episodes include interesting interviewees not only from the yoga world but from all areas of the health and wellness industries. Every show also includes a questions and answers segment with Lucas and a Nutritional Tip of the Week. Get this app.

ybn2


  • TIP THREE – FLASH CARDS – Be traditional and make your own, or try this flash cards app: AnkiApp. This app is new to me but I’ve already studied with it quite a lot. You search topics, choose a deck you like, download it to your app and start flipping. They even have flash cards specific to yoga.
screenshot_2015-12-20-13-40-43.png

AnkiApp, English/Sanskrit Pose Names

  • TIP FOUR – CREATE A STUDY GROUP – Ask fellow yoga students and/or teachers to study with you. Share resources and help commit each other to study dates and times. Claim a large table at a cafe, spread it all, sip some herbal tea and study.

img_20151121_125110.jpg

Changing your perspective of yoga from just a practice to a study of yoga will deepen your experience. Once you open that portal you’ll realize that there’s so much to learn and with that learning your practice will evolve.


*If your studying is taking you to a retreat or teacher training, then check out one of my first blog posts full of how to start the process of choosing the right YTTC for you.

My Guide to Packing for Beach Vacations

It’s holiday time which means vacation time here in Korea, which of course means travel to other parts of Asia for many expats. This year I’ll be packing my backpack for a 10 day trip to Panglao, Bohol in The Philippines.

This will be my second visit to The Philippines, a beautifully romantic, tropical place made up of thousands of islands. The Philippines is home to great  dive spots and stunning beaches, not to mention very friendly people. On my last trip, my boyfriend and I snorkeled twice daily, seeing stunning sea turtles and swarms of sardines. This trip I plan to snorkel again as well, and so am being mindful about what to pack.

Beach sunset (Nicaragua)

Beach sunset

When taking a beach vacation, especially one in which you plan to spend a lot of time in the water, it’s important to consider the lasting effect you and the items you bring with you might have on the environment. For your next beach trip, give some thought to what you bring, wear, and leave behind.

Do your part when packing to make your footprint as small as possible.
  • SUN PROTECTION – Sunscreen: Not all sunscreens are created equal, do a little research and find a product that is labeled reef safe, especially if you plan to swim, snorkel, SUP, or dive. Some chemicals in sunscreen (oxybenzone) damage reefs and marine life, avoid screens containing the chemical and opt instead for more natural products that contain zinc oxide.
  • SUN PROTECTION – Cover Up: Get a rash guard. Rash guards are thin, breathable tops worn over swimsuits or in warm waters for surf and other water activities to protect against harmful UV rays. As much as I prefer natural fibers for my clothes, when it comes to active and performance wear, synthetics perform best. Buy quality and treat your clothes with care for an extended and purposeful product life. Bring a small cap or beach hat for your trip, too; sunglasses are great for protecting the eyes, but hats will keep rays off of your face and will therefore be cooling.
20151213_140232.jpg

Hat and rash guard.

  • FROM THE SHOWER TO THE SEA – Pack Wise Toiletries: Just like sunscreen, other toiletries that you bring on your trip with you are potentially harmful to the environmental. Bring, or DIY your own shampoos, conditioners, lotions, soaps, cosmetics, toothpaste and more that are paraben-free (a common, dangerous preservative.) Making this extra effort is especially important when staying at eco-lodges or resorts where the gray water (water from showers/laundry/washing) runs straight back into the environment. Some mindful accommodations even require that you bring only safe products with you.
20151213_140354.jpg

Without… PARABENS

  • REDUCE PLASTIC – Bring a Tumbler: The Philippines is one of the top five producers of plastic ocean pollution in the world and I do not want to contribute to that statistic while visiting, so I’ll be bringing a metal, reusable water bottle and my trusty tumbler with me. Potable water is not always easily found in remote places, so bottled water becomes the norm. Bringing a personal, filtering, reusable water bottle might be a solution for the brave. Other options include iodine drops or this LED purifier I’ve recently learned about. My boyfriend and I traveled Costa Rica & Nicaragua for a month with a filtering water bottle and had no problems.
Tumbler

My well-weathered tumbler!

  • LEAVE A POSITIVE PRINT – Donate: Backpacking is a basic way to travel the world, I say basic because you have to edit your packing list again, and again to get it all to fit into a 40 liter pack that you will then carry with you – everywhere. Packing light is a necessity when it comes to backpacking, but if you’re traveling internationally and get a baggage allowance that comes with your ticket, then consider packing a second suitcase of donations for your intended location. Get in touch with an organization ahead of time so you can drop them off at the beginning of your trip. Collect used clothing  or other needed items from friends and relatives. Tip – plan to wear some donations during your trip and leave them at the end to decrease your packing load.
DSC03339

Donations that went with me to my YTTC in Nicaragua, modeling with them is Pepper.

This is just a short list of packing tips, concentrating on conscious/eco travel. Be sure to read your toiletries and cosmetics labels the same way that you read your food labels, and ditch the generic for greener items, or DIY some baking soda toothpaste. Then, relax on the beach, knowing that you have done a small part in reducing ocean pollution!